As a photographer, understanding how different lighting conditions can transform your images is key to creating stunning photographs. From the soft glow of sunrise to the vibrant colors of mid-morning, and from the challenges of high noon to the enchanting golden hour and twilight, each time of day offers its own unique canvas for creativity. In this series, we will explore the distinctive qualities and tips for capturing beautiful shots during each phase of the day. Get ready to unlock a world of possibilities and elevate your photography skills.
Sunrise – The Early Bird’s Canvas
As a photographer, there is something truly magical about witnessing the first light of the day breaking over the horizon during sunrise. This period, often referred to as the “Magic Hour,” offers a unique quality of light that can elevate your outdoor photography to another level. In this section, I will delve into the distinctive characteristics of sunrise light, explore the best landscapes or subjects to capture during this time, and provide valuable tips to help you prepare for a successful sunrise shoot.
Unique Qualities of Light During Sunrise
One of the most remarkable aspects of sunrise light is its soft, warm, and golden hue that bathes the surroundings in a gentle glow. The angle of the sun during this time creates long, dramatic shadows and a sense of depth that adds dimension to your photographs. The light at sunrise is also diffused and less harsh compared to midday sun, resulting in a flattering illumination that can enhance the textures and colors of your subjects.
Best Landscapes or Subjects for Sunrise Photography
When it comes to choosing the perfect landscapes or subjects for sunrise photography, natural elements such as mountains, lakes, beaches, and forests tend to look especially stunning during this early morning light. The tranquil atmosphere of dawn can create a serene and ethereal mood in your images. Additionally, including elements like silhouettes of trees or structures against the colorful sky can add a sense of drama and intrigue to your photos.
Tips for Preparing for a Sunrise Shoot
- Check the weather forecast: Ensure you are informed about the weather conditions for the morning of your shoot to anticipate any potential challenges or opportunities.
- Arrive early: Plan to reach your shooting location well before sunrise to set up your equipment, scout for the best vantage points, and soak in the pre-dawn ambiance.
- Bring the right gear: Make sure you have essential photography equipment such as a sturdy tripod to capture stable shots in low light, a wide-angle lens for expansive landscapes, and lens cloths to keep your gear clean from morning dew.
- Experiment with compositions: Explore different angles, perspectives, and framing options to create compelling and visually engaging photos that make the most of the unique sunrise light.
By embracing the early hours of the day and harnessing the enchanting light of sunrise, you can unlock a whole new world of creative possibilities in your photography. Remember, each sunrise is a fresh canvas waiting to be painted with your vision and passion.
Mid-Morning – Clear and Bright
As a photographer, I find mid-morning light to be truly enchanting. The way the sun is positioned at this time of day brings out vibrant colors and clarity in my shots, making them visually stunning. In this section, we will explore the advantages of mid-morning light for photography and discover the ideal settings and subjects to capture during this magical time.
Advantages of Mid-Morning Light for Vibrant Shots
When the sun is higher in the sky during mid-morning, it casts a beautiful, soft light that enhances the colors in your photographs. This type of light is perfect for capturing vibrant and crisp shots with a natural brightness that elevates the overall look of your images.
The mid-morning light also creates well-defined shadows that can add depth and dimension to your photos. These shadows can help create interesting patterns or emphasize textures, adding an artistic element to your compositions.
Additionally, the light during mid-morning is generally gentler compared to harsh midday sunlight. This softness allows for better exposure control and reduces the risk of overexposure or harsh shadows that can detract from the beauty of your subjects.
Ideal Settings and Subjects for Mid-Morning Photography
- Landscape Photography: Mid-morning light is ideal for capturing expansive landscapes with rich colors and intricate details. The soft, clear light brings out the beauty of natural elements such as mountains, forests, or bodies of water.
- Portrait Photography: The flattering mid-morning light can enhance portraits by providing a soft glow that complements your subject’s features. This light is especially great for outdoor portrait sessions, creating a warm and inviting atmosphere.
- Architectural Photography: The clarity and brightness of mid-morning light are perfect for highlighting architectural details and structures. Buildings, bridges, and urban landscapes look striking against the backdrop of a clear blue sky during this time.
- Flower and Macro Photography: Mid-morning is a wonderful time to capture the vibrant colors and delicate details of flowers and small subjects. The soft light allows you to showcase intricate textures and vivid hues in your close-up shots.
Remember to adjust your camera settings accordingly to make the most of mid-morning light. Consider using a lower ISO for sharper images, experimenting with different apertures to control depth of field, and focusing on composition to create visually appealing photographs.
Next time you venture out for a photography session, try capturing the beauty of mid-morning light and explore the endless creative possibilities it offers for your shots.
Stay tuned for more tips on capturing stunning outdoor photographs throughout different times of the day.
Noon – The High Sun Challenge
Shooting during high noon presents unique challenges that photographers often encounter when trying to capture the perfect shot. The harsh light and strong shadows that come with the midday sun can create difficulties in achieving the desired outcome. However, with the right techniques and understanding of light, it is possible to mitigate these challenges and still produce stunning photographs.
Challenges of Shooting During High Noon
One of the primary challenges of shooting during high noon is the harshness of the light. The sun being directly overhead creates strong shadows and highlights that can be challenging to balance. This harsh light can lead to overexposed or washed-out images, making it difficult to capture details and tones accurately.
Another challenge photographers face during high noon is dealing with the contrast between shadows and highlights. The high contrast can result in loss of detail in both dark and bright areas of the photograph, affecting the overall quality of the image.
Techniques to Mitigate Harsh Noon Light
To mitigate the harsh light of high noon, photographers can utilize various techniques to soften the shadows and create more even lighting conditions. One effective method is to use diffusers or reflectors to bounce and diffuse the sunlight, reducing the intensity of the shadows and highlights.
Finding shade is another practical technique to combat harsh noon light. Positioning the subject or yourself in the shade can help create a more even and flattering lighting environment, minimizing the harsh shadows and overexposure typically associated with direct sunlight.
Suitable Photography Themes for Noon
While shooting during high noon may present challenges, there are still many suitable photography themes that can thrive in this lighting condition. Urban settings with ample shade offer opportunities for dynamic compositions and interesting contrasts between light and shadow.
Additionally, high noon is ideal for capturing vibrant colors and textures that stand out under the bright sunlight. Photographing bold architectural structures or street scenes can yield striking results during this time of day, embracing the unique qualities that noon light can bring to a photograph.
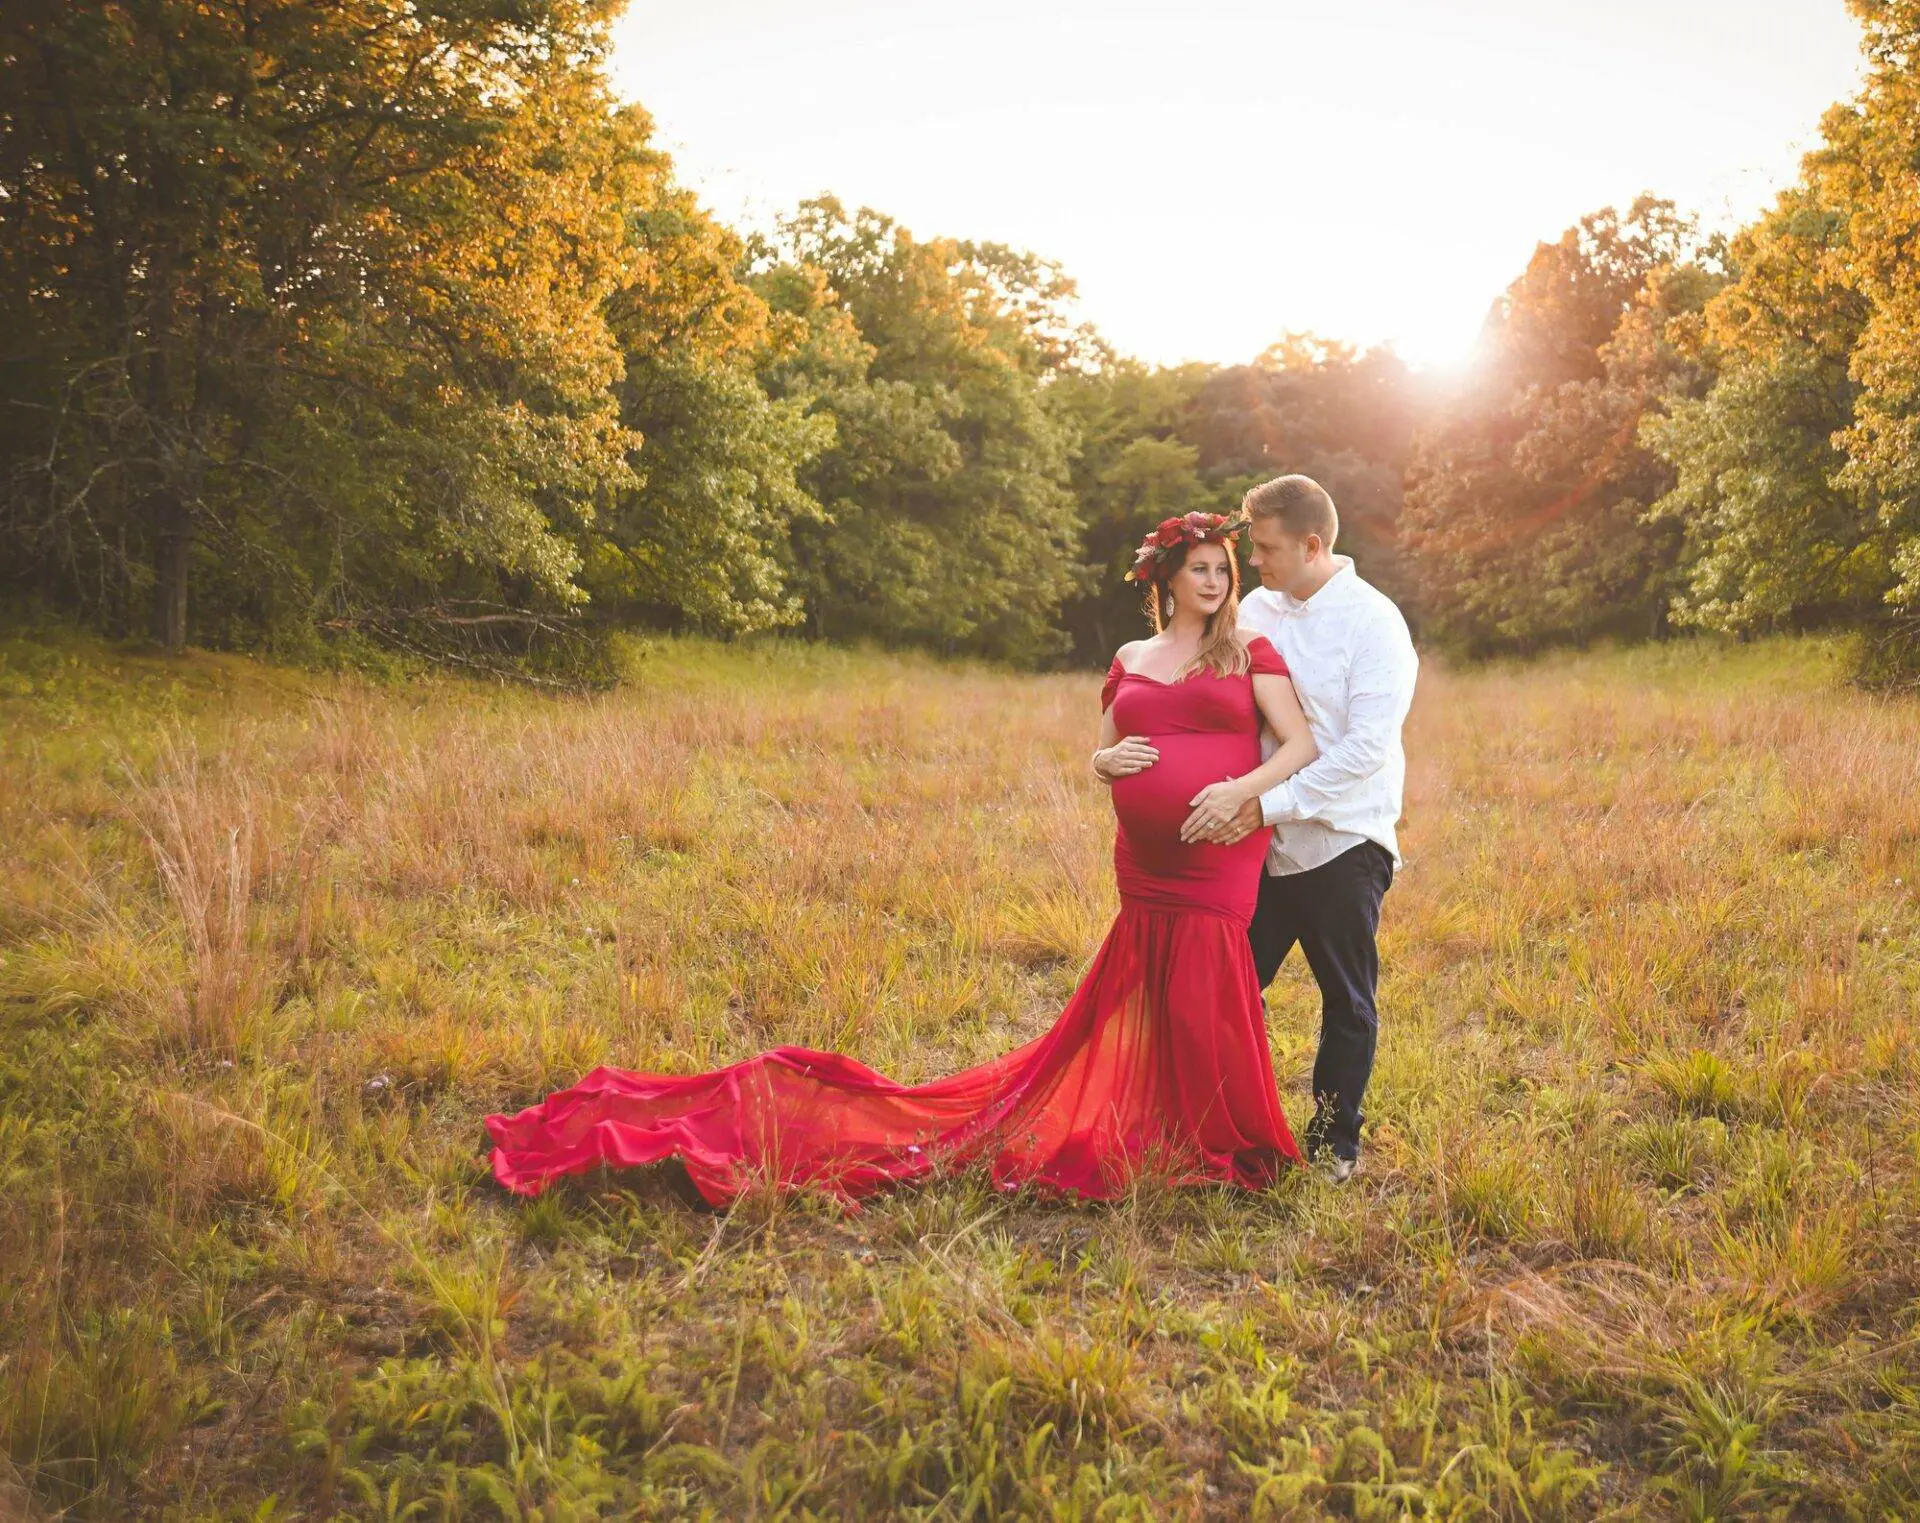
Afternoon – The Golden Prelude
As we delve into the afternoon segment of optimal photography times throughout the day, we encounter the mesmerizing transition of light from harsh to soft. This phase, often referred to as “The Golden Prelude,” offers a unique canvas for capturing captivating images.
Transition of Light
One of the most intriguing aspects of the afternoon is the gradual shift in the quality of light. As the sun starts its descent, the harsh midday glare softens into a warm, golden hue. This transition creates a magical atmosphere that can add depth and warmth to your photographs.
Utilizing Changing Sun Angles
The changing angle of the sun during the afternoon opens up a world of creative possibilities for photographers. By strategically positioning yourself and your subjects in relation to the sun, you can play with shadows, highlights, and textures to enhance the visual interest of your photos.
Recommended Subjects and Settings
When it comes to afternoon photography, certain subjects and settings work particularly well in the soft, golden light. Natural landscapes such as parks, forests, and bodies of water can be beautifully accentuated during this time of day. Additionally, architectural elements with intricate details can cast striking shadows and patterns in the afternoon glow.
- Subjects: Nature landscapes, architecture, silhouettes
- Settings: Use a wide aperture for a shallow depth of field, experiment with backlighting, capture long shadows for added drama
- Camera Settings: Consider using a lower ISO for richer colors, adjust white balance to enhance warmth, play with exposure compensation to balance light and shadow
By embracing the unique characteristics of afternoon light and exploring different subjects and settings, you can elevate your photography skills and create stunning visual narratives during “The Golden Prelude.”
Golden Hour – When Magic Happens
Let’s delve into the enchanting world of the Golden Hour in photography. This magical time of day holds a special allure that can elevate your portraits and landscapes to sublime heights. In this section, we will explore the definition and timing of the golden hour, its significance for portrait and landscape photography, and valuable composition tips to make the most of this ethereal lighting.
Definition and Timing of the Golden Hour
The Golden Hour, also known as the Magic Hour, is a period shortly after sunrise or before sunset when the light is soft, warm, and golden. This phenomenon occurs due to the sun’s low angle in the sky, which creates a flattering and atmospheric glow that enhances the colors and textures in your photos.
Timing-wise, the Golden Hour typically lasts for about an hour after sunrise and before sunset, though the exact duration may vary depending on your location and the time of year. It’s crucial to check the sunrise and sunset times in your area to make the most of this captivating period of light.
Ideal for Portrait and Landscape Photography
The Golden Hour is a photographer’s dream, particularly when it comes to capturing stunning portraits and landscapes. In portrait photography, the soft golden light can add a warm and flattering glow to your subject’s skin, making them appear more radiant and inviting.
When it comes to landscape photography, the Golden Hour bathes the scenery in a magical light that can transform ordinary landscapes into breathtaking vistas. The warm tones and long shadows create depth and dimension, enhancing the mood and atmosphere of your photos.
Composition Tips for Golden Hour Lighting
To make the most of the Golden Hour lighting, consider the following composition tips:
- Golden Angle: Take advantage of the soft, angled light during the Golden Hour to create visually striking compositions. Experiment with side lighting, backlighting, and rim lighting to add depth and drama to your photos.
- Warm Tones: Embrace the warm, golden hues of the Golden Hour by incorporating them into your composition. Look for elements in your scene that can reflect or absorb this beautiful light, such as golden leaves, reflective surfaces, or warm-toned buildings.
- Silhouettes: Explore the art of silhouette photography during the Golden Hour. Use the contrast between the dark silhouettes of objects or people against the vibrant sky to create striking and artistic compositions.
- Leading Lines: Utilize leading lines in your composition to guide the viewer’s eye through the image. The soft, warm light of the Golden Hour can accentuate leading lines such as roads, fences, or shorelines, adding depth and visual interest to your photos.
By incorporating these composition tips into your photography during the Golden Hour, you can elevate your images to new heights and capture the magic that happens when light and creativity intersect.
Sunset – The Day’s Grand Finale
As a photography enthusiast, I am always captivated by the grandeur of a sunset – the magical moment when the day transitions into night. In this section, we will delve into the mesmerizing characteristics of sunset lighting, the art of capturing vivid colors and striking silhouettes, and how to effectively plan for the variability in sunset lighting conditions.
Characteristics of Sunset Lighting
One of the most enchanting aspects of sunset lighting is the warm, soft glow that bathes the surroundings. During sunset, the sun is positioned low on the horizon, creating long shadows and a golden hue that adds a touch of magic to any scene. The light during sunset is often diffused, lending a dreamy quality to photographs.
Capturing Colors and Silhouettes at Sunset
Sunsets are renowned for their spectacular display of colors, ranging from vibrant oranges and pinks to deep purples and blues. As a photographer, it is essential to embrace these rich hues and use them to create stunning compositions. Silhouettes against the backdrop of a colorful sunset can add depth and drama to your images, enhancing the visual impact.
Planning for Variability in Sunset Lighting Conditions
While sunsets are undeniably breathtaking, they can also be unpredictable in terms of lighting conditions. Factors such as cloud cover, haze, and atmospheric particles can influence the colors and intensity of the sunset. To prepare for these variable conditions, it is advisable to scout your location in advance, have multiple shooting angles in mind, and be ready to adapt your settings on the fly to capture the best possible shots.
By understanding the characteristics of sunset lighting, mastering the art of capturing colors and silhouettes, and planning for variability in lighting conditions, you can elevate your sunset photography skills and create captivating images that showcase the beauty of this magical hour.
Twilight – The Blue Hour
As a photography enthusiast, exploring the concept of the blue hour can illuminate new possibilities for captivating images. The blue hour, also known as twilight, is a brief period before sunrise or after sunset when the sky takes on a magical deep blue hue. This atmospheric phenomenon creates a dreamy and ethereal ambiance that can add a touch of mystery and beauty to your photographs.
During the blue hour, the soft, diffused light enhances colors and details, making it an ideal time for capturing low-light scenes with a unique charm. Understanding how to harness the visual effects of the blue hour can take your photography skills to the next level.
Best Practices for Capturing Low-Light Scenes
When shooting during twilight, it’s crucial to know how to make the most of the limited light available. Here are some best practices to consider:
- Use a tripod to ensure stability and minimize camera shake in low-light conditions.
- Opt for a low-light lens with a wide aperture to gather more light and achieve sharp images.
- Adjust your camera settings to longer exposure times to compensate for the reduced light levels.
- Experiment with different white balance settings to achieve the desired mood and color tones in your twilight shots.
- Consider incorporating artificial lighting sources, such as flash or LED lights, to illuminate your subjects creatively.
Gear Recommendations for Twilight Photography
Equipping yourself with the right gear can make a significant difference in your twilight photography endeavors. Here are some essential tools to consider adding to your kit:
- A sturdy tripod: Essential for stable shots and long exposures during low-light conditions.
- Fast prime lenses: Opt for lenses with wide apertures (e.g., f/1.4 or f/1.8) to maximize light intake.
- Remote shutter release: Helps prevent camera shake when triggering the shutter for long exposure shots.
- Filters: Consider using ND filters to control the amount of light entering your lens during twilight photography.
- Extra batteries and memory cards: Ensure you have sufficient power and storage for extended shooting sessions.
In conclusion, mastering the art of twilight photography is a journey that requires a deep understanding of the unique visual effects that the blue hour brings. By implementing best practices for capturing low-light scenes and investing in the right gear, such as tripods, low-light lenses, and remote shutter release, you can achieve truly breathtaking results.
The blue hour, that magical time between sunset and complete darkness, creates a mesmerizing atmosphere that adds an ethereal touch to your photographs. Understanding how to harness this light requires patience and practice. Experimenting with different camera settings and techniques will allow you to capture the subtle nuances of color and shadow that make twilight photography so captivating.
When it comes to shooting in low-light conditions, having the right equipment is crucial. A sturdy tripod will keep your camera steady during long exposures, preventing any unwanted blur or shake. Investing in a high-quality low-light lens will allow you to capture more detail in darker areas without sacrificing image quality.
Additionally, using a remote shutter release can eliminate any camera shake caused by manually pressing the shutter button. This small accessory can make a big difference in achieving sharp images during long exposure shots.
Remember that twilight photography is not just about technical skills; it’s also about embracing your artistic vision. Take the time to scout locations beforehand and envision how you want your final image to look. Consider incorporating elements such as silhouettes or reflections for added interest and depth.
Lastly, don’t be afraid to experiment and push boundaries with your twilight photography. Embrace the challenge of working with limited light sources and explore different compositions and angles. Remember that each photograph is an opportunity for self-expression and storytelling.
So go out there armed with knowledge, passion, and the right gear – let your creativity shine through as you capture timeless moments during this magical time of day!