There's something truly magical about the early days of a newborn's life. Each yawn, stretch, and sleepy smile is a fleeting moment that deserves to be captured and cherished forever. As a professional newborn photographer, I understand the art of freezing these precious times in a photograph, each telling its own story of love, wonder, and even a bit of delightful chaos.
I know that not every family opts for professional newborn photography right away, and there are many reasons for this. Recognizing this, I want to empower you with the tools to capture beautiful, heartfelt memories right in your own home.
This guide is crafted for parents who wish to take on the rewarding challenge of DIY newborn photography. I’m here to share practical, easy-to-follow tips that will help you capture those irreplaceable moments with ease. So, whether you're using a camera or your smartphone, let’s embark on this exciting journey of DIY newborn photography together.
Why Newborn Photography Matters
Why is capturing newborn moments so important? Well, think about it! Those tiny fingers and toes morph into big hands and feet before we even have a chance to catch our breath. According to a study by the National Association of Professional Child Photographers, about 80% of parents wish they had taken more photos of their growing children before they reached their first birthdays. These fleeting moments are incredibly precious and once they are gone, they are gone forever.
Photos serve as tangible memories that we can look back on and remember how tiny they once were. These memories shape our family narratives and help us to preserve the essence of those early days. From the soft, delicate features of a newborn’s face to the peacefulness of their slumber, every photograph is a story, a captured moment in time that we can treasure forever.
Through photos, we document their first smiles, their little yawns, and their tiny hands wrapped around our fingers. These images become heirlooms, passed down through generations, allowing future family members to glimpse the beginning of a life story. They remind us of the love, joy, and wonder that a new life brings into our world.
In an era where life moves so fast, taking the time to capture these moments becomes even more vital. Photographs not only freeze time but also evoke emotions and memories that might otherwise fade away. They are a powerful way to celebrate and remember the early stages of life, a reminder of the journey from tiny baby to growing child.The Purpose of This Guide
The main aim here is pretty straightforward: I want to empower you to take those photos yourself. With a little practice and some of the tips I’m about to share, you'll be able to create beautiful imagery that captures the essence of your newborn. Remember, it’s not about perfection; it’s about the moments that you create as a family. So, let’s roll up our sleeves and get creative!
Getting Started
Before jumping into the nitty-gritty of taking photos, let’s talk about setting the stage. Choose the right time and place for your photo session — it can make all the difference! Aim for moments when your baby is calm, maybe right after a nap or feeding. Timing can be everything!
Next, don’t overlook the space you’re shooting in. Find a quiet room with great natural light and minimal clutter. Clean backgrounds can really draw the eye to your newborn, which is what we want, right? It's like making a blank canvas for your tiny masterpiece!
Throughout this guide, I’ll share incredible ideas to enhance your photography game—from using household items as props to mastering the basic rules of photography. Together, we’ll uncover ways to make memories that'll last a lifetime and tell a beautiful story of your little one's first days. Let’s make some photo magic!
Choose the Right Time and Place
When it comes to newborn photography, one of the biggest challenges is capturing the little one at just the right moment. Trust me, understanding the best times to photograph your baby can make a world of difference! I've learned through experience that soft natural light is key to those dreamy shots that you'll treasure forever.
Best Time to Photograph
Experts often rave about the "golden hour," which is that period shortly after sunrise or just before sunset when the light is absolutely perfect. It's like nature's filter, creating a soft and warm ambiance that makes everything look magical. If you can manage a morning or late afternoon shoot, you’ll be rewarded with that gorgeous glint in your photos!
As a bonus tip, the best age for newborn photos is usually within the first couple of weeks after birth. Babies are typically sleepier (and a tad more pliable) during this time, making it easier to photograph those sweet little poses. So, if your baby is fresh to the world, you might want to grab the camera right away!
Setting Up at Home
Now, you might be wondering where to shoot these adorable photos. I highly recommend picking a quiet and comfortable room in your home. It’s worth the effort to create a peaceful environment where both you and your little one can relax. Look for a room that has plenty of natural light pouring in from large windows. A cozy nursery or even a well-lit living room could be perfect!
Not only will good lighting create that beautiful glow in your photos, but it will also help keep your baby calm and happy. We know a relaxed baby is a photogenic baby!
Minimizing Clutter
Next up on the list is the background of your photos. Trust me, a messy or busy background can really take away from the cuteness of your baby. Keeping things simple is crucial! Whether it’s a soft blanket, a beautifully textured floor, or a simple wall, the focus should be solely on your little munchkin.
Consider laying out a soft, neutral-colored blanket where your baby can be the star of the show. I tend to avoid overly bright or patterned backgrounds because they can distract from the subject—in this case, your beautiful baby. Simple can be stunning! It let’s those tiny toes and precious expressions shine through without any distractions.
Quick Checklist for Your Photo Session
- Time: Shoot during the golden hour for optimal soft light.
- Location: Choose a comfortable, well-lit room.
- Background: Keep it simple and clutter-free to focus on the baby.
Each of these tips can significantly enhance your newborn photography experience. It’s all about creating a calm and beautiful environment that allows you to capture those fleeting moments of joy. In a world where time races by, the sweet smiles and innocent sleeping phases of your newborn are truly priceless. So, grab that camera and get ready to create memories you’ll cherish for a lifetime!
Get Creative with Props
When it comes to capturing those precious newborn moments, props can really elevate your photos and add a touch of creativity. You might be surprised to discover how many everyday items around your home can serve as fantastic props. Let’s explore some ideas that will help you get the most out of your newborn photography session!
Using Household Items
First off, let's talk about household items. Have you ever thought about using blankets or cute little baskets? Seriously, you don’t need to spend a ton on fancy props to get stunning photos. That soft, fuzzy blanket you love? Perfect for a cozy backdrop! Just lay it down in a nice, well-lit area, and you’ve got a dreamy setting.
And what about baskets? They can create such an adorable setup! Just be sure to line the basket with a soft blanket to keep your little one comfy and safe. It’s a simple idea that can lead to whimsical shots, showcasing your baby’s tiny features in a delightful way. Plus, adding a little touch of fabric or a cute stuffed animal can bring in extra charm—just let your creativity fly here!
Safety First
Speaking of keeping things cozy, let’s not forget safety! This is where you need to channel your inner safety guru. I can’t stress enough how important it is to ensure that your props are secure. For example, if you’re using a basket or a blanket, make absolutely sure that they’re clean and free of any hazards. Avoid anything that might pose a risk of suffocation or falls. Your baby’s safety should always come first, so always be mindful of how they are positioned.
Using pillows or cushions as props? Go for it, but be sure to support your baby well and never leave them unattended. A little planning goes a long way in creating a beautiful, yet safe, photography experience. Always better safe than sorry, right?
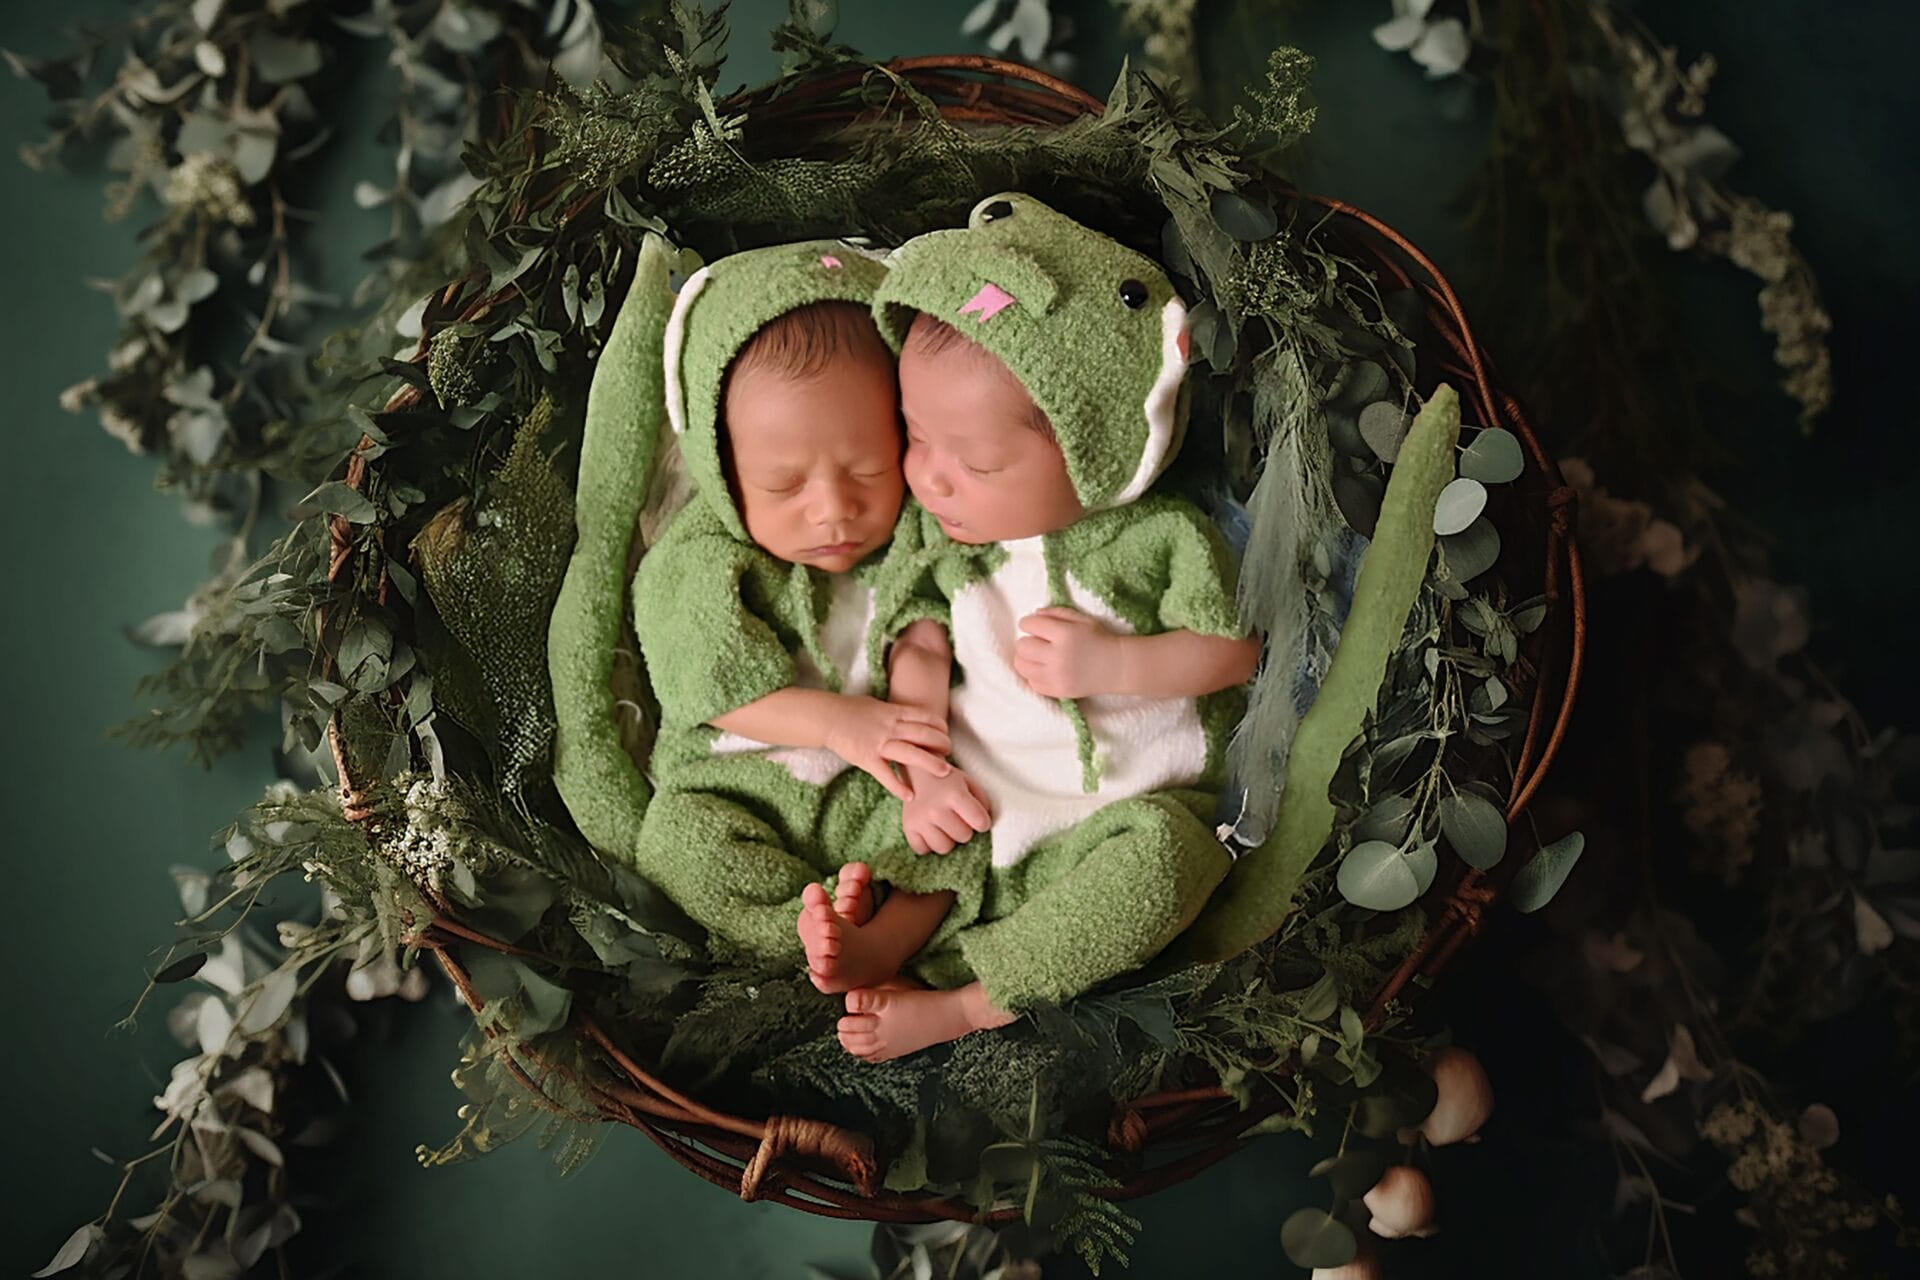
Theme Ideas
Now onto one of my favorite parts—themes! The possibilities are endless, and you can easily set up a delightful scene at home. If you’re feeling adventurous, why not try a nature theme? Take some soft green tones, maybe some flowers, or even a light sprinkle of leaves. It creates a peaceful, organic vibe that everyone will love.
If classic is more your style, go for a simple white backdrop. This minimalist approach can really make your baby pop in the pictures. With neutral tones, you can add some texture with fabrics like cotton or muslin for dimension. Trust me, the less clutter, the more focus there is on your darling baby!
Colorful themes can also be a game-changer! Perhaps a rainbow of blankets or colorful toys can liven things up. Just a few bright pops against a neutral backdrop can elevate the photo’s aesthetic and will certainly bring a smile to anyone who sees them
Don’t hesitate to mix and match these ideas. With a little imagination, your props can tell a story and add life to your images. Why not involve older siblings too? A shared blanket or a themed idea that includes them adds a lovely personal touch, making it a family affair!
As you dive into this fun world of DIY newborn photography, always remember that the goal is to capture genuine moments filled with love and joy. Let your personality shine through your choices, and most importantly, have fun with it!
Master the Basics of Photography
When I first dabbled with photography, it felt like trying to decipher a secret code. With all the camera settings, rules, and techniques, I had to navigate my way through what often seemed like a maze! But as I started taking photos of newborns, I quickly realized that having a grasp on the basics made a world of difference. Let me share some of these insights with you.
Understanding Camera Settings
First things first—let's tackle the camera settings. Whether you're using a smartphone or a DSLR, knowing how to tweak settings can elevate your photos substantially. I remember my initial attempts were often hit-or-miss, primarily because I shot in automatic mode, and the results were usually underwhelming.
- ISO: This is about your camera's sensitivity to light. For indoor photos, especially near windows, keeping the ISO between 100-800 helps avoid grainy images. Too low, and you'll end up with a dark picture, while too high may introduce unwanted noise.
- Aperture (f-stop): This determines how much light enters the camera. A lower f-stop (like f/2.8) allows more light in and creates that lovely blurred background effect, making your baby pop out of the image!
- Shutter Speed: Babies can be squirmy little creatures, so having a fast shutter speed (1/200 or faster) can freeze those precious moments without blur.
These settings may sound daunting, but starting simple is the key. Many smartphone cameras auto-adjust these settings too—so explore these options and see what works best for you!
The Rule of Thirds
Next up, let’s chat about composition. The Rule of Thirds is a game-changer when it comes to framing your photos. Imagine breaking your image down into thirds both horizontally and vertically, creating a tic-tac-toe grid over your viewfinder. By placing your baby at one of these intersections, you create a more balanced and engaging photo. I often find that when I position the baby slightly off-center, it improves the overall aesthetics of the shot. Try it! You’d be surprised at how it can transform a mundane shoot into a work of art.
Focus on Details
Now, let’s not forget about the little things that make your pictures truly special. Often, I find myself getting lost in the cuteness of the baby as a whole, but some of my best shots have come from focusing on intricate details. Think about capturing those tiny toes, delicate fingers, or expressive eyes. These close-ups tell a story that a wider shot sometimes misses.
“Photography is the art of making memories tangible.”
Incorporating these details can invoke emotions and evoke a sense of nostalgia later. It’s like putting together a puzzle; every small piece helps to create the bigger picture.
So, there you have it! By getting a grip on your camera settings, employing the Rule of Thirds, and focusing on those adorable details, you can elevate your newborn photography game. Each click of the shutter captures not just an image but a moment in time. Go ahead, experiment with these techniques, and don’t shy away from making them your own. After all, photography is supposed to be fun and creative!
Use Natural Light
When it comes to newborn photography, one of the absolute game-changers is natural light. I’ve learned that harnessing the soft, warm rays of the sun can make a significant difference in the overall feel of your photographs. Let’s dive into some practical tips on how to find and utilize natural light while avoiding those pesky harsh shadows that can ruin an otherwise perfect shot.
Finding Natural Light Sources
The first thing I do is scout my home for the best natural light sources. Windows can be incredible allies in this pursuit. Have you ever taken a moment to observe how the light filters through your window? Each window has its own unique character depending on the time of day and the direction it faces. For example, east-facing windows are ideal in the morning, delivering soft golden rays, while west-facing windows can create a warm glow in the late afternoon.
However, not all light is good light. I’ve made the mistake of photographing directly in harsh sunlight, and trust me, the shadows it creates are less than flattering for our little ones. Instead, I suggest positioning your baby near a window but at a slight angle, allowing the light to wrap around them rather than hit directly. You can also use sheer curtains to diffuse the light a bit – this makes it softer and more pleasing.
Time of Day
Speaking of positioning, timing is everything when it comes to capturing that coveted soft light. I’ve found that just after sunrise and before sunset are peak times for beautiful, diffused light. It’s worth scheduling your photo sessions during these hours if you can. You’ll notice how the light becomes almost magical, casting gentle shadows and illuminating those tiny features just right.
What about those days when you’re feeling a bit rushed? If I can't wait for the perfect moment, I prefer to photograph indoors around midday but avoid the direct sunlight pouring in. Instead, I'll use the light from nearby windows where the sun isn’t directly shining through. It's surprising how just a few feet can make a difference!
Diffusing Light
Now, even with all this talk about leveraging natural light, there may still be instances where it’s just too bright. Don’t worry; there are simple techniques you can apply to diffuse that harshness. A quick solution is to use a white bed sheet or a photography diffuser — even something as basic as a shower curtain can help. I often rig up some white fabric between the baby and the window to soften those blazing beams.
Final Thoughts on Using Natural Light
Don’t be afraid to experiment with these tips — after all, capturing the beauty of your newborn is the goal. With a little trial and error, you’ll discover the angles, times, and diffusing techniques that work best for you. And remember, the subtle beauty of natural light can transform even the simplest moments into cherished memories. Happy shooting!
Editing Tips
When it comes to photography, whether for newborns or anything else, editing can make a world of difference. I’ve dabbled with various editing tools, and I can tell you, it’s more accessible than you might think. Let's dive into some editing tips that can help you enhance your photos without breaking the bank!
Basic Photo Editing Apps
First off, let’s talk about some basic photo editing apps I absolutely swear by. There are plenty of free or affordable options that allow you to kick up the quality of your photos without needing to be a tech genius.
- Snapseed: Owned by Google, Snapseed is a powerhouse of a free app packed with professional-grade tools. From basic edits to advanced features like selective brushing, it’s got it all.
- VSCO: This app operates on a freemium model, meaning there are free features, but you can also opt for additional filters and tools. Its filters are gorgeous and are perfect for giving your photos that extra “wow” factor.
- Canva: While primarily known for graphic design, Canva has some easy-to-use photo editing tools. Plus, you can add overlays, text, or even create collages!
No need to stress about high costs when you have such handy tools at your fingertips. I remember when I was feeling overwhelmed by my camera roll – just a few edits could transform the images from average to stunning.
Simple Edits to Try
Once you have your preferred app set up, it’s time to dive into some simple edits that can change the game. Here are a few essential adjustments I recommend:
- Brightness: Sometimes, your photo might be a little darker than you’d like. Try brightening it up to let the natural light shine through.
- Contrast: Increasing the contrast can help your subject pop from the background. Just be careful not to overdo it; you want to enhance, not overshadow.
- Cropping: A well-thought-out crop can draw attention to your subject and eliminate distracting elements from the frame. Experiment with different compositions until you find the one that feels right.
It’s amazing how a few clicks can turn a good photo into a great one. I sometimes spend a little time experimenting with these tools, and the results never cease to amaze me.
Preserving Natural Beauty
As tempting as it can be to go all-out with filters and edits, I’m a firm believer in preserving that natural beauty. After all, the goal is to enhance rather than alter. Here are some gentle reminders to keep your edits authentic:
- Stay True to Your Subject: Focus on bringing out the beauty in the moment you captured, whether it's a laugh or a sleepy expression of your newborn. Remember, the most precious moments often don’t need heavy editing.
- Avoid Over-Editing: It’s easy to get carried away with sliders and filters. Less is often more! A slight tweak in brightness or contrast can yield stunning results without losing the essence of the moment.
"Photography is about capturing the essence of a moment – not altering it." – Anonymous
One thing I’ve learned through my journey in photography is that the raw emotion of a moment is often more compelling than any filter you can apply. So, as you edit your images, focus on highlighting those little details that make each photograph special.
Editing isn’t just a technical process; it’s an art. It takes time and practice to get it right, but with these apps and tips, you’ll be well on your way to creating beautiful images that resonate with emotion and authenticity.
Patience and Persistence
When it comes to capturing those perfect newborn photos, I’ve learned that patience and persistence are absolutely key. As any parent will tell you, those little bundles of joy can be unpredictable! Maybe they’re wide awake and ready to pose one moment, and the next they’re sound asleep or fussy. But here's the thing: taking multiple shots can really make a difference when you're aiming for that one perfect moment that encapsulates all the cuteness.
My first experience trying to photograph my newborn was a humbling one. I had all these lofty expectations about creating stunning portraits that would rival professional photographers. But what I quickly realized was that I needed to adjust my mindset. Instead of expecting perfection with just one click of the shutter, I discovered the importance of taking lots and lots of photos—literally hundreds!
Why Take Multiple Shots?
You might wonder why it's crucial to take so many pictures. Well, let me tell you, sometimes the best expressions pop up in the briefest of moments! Think of it like fishing; sometimes the perfect catch is just waiting for the right bait. I’ve found that capturing a wide array of poses and expressions not only gives me a better chance of getting a standout image but also helps create a beautiful narrative of my baby's early days. You never know when that adorable smile or the cutest yawn can happen, so having your camera ready to go is essential!
Reading Baby’s Cues
Another lesson I've learned through countless photo sessions is the importance of understanding my baby’s mood. It’s way easier to take amazing photos when the little one is happy and comfortable. Before I start snapping away, I make sure they’ve been fed, changed, and are in a relaxed state. If I rush into the shoot without considering their needs, I often end up with a lot of blurry faces and cranky expressions. When I take a moment to assess if my baby is ready to be photographed, it always pays off.
Capturing Family Moments
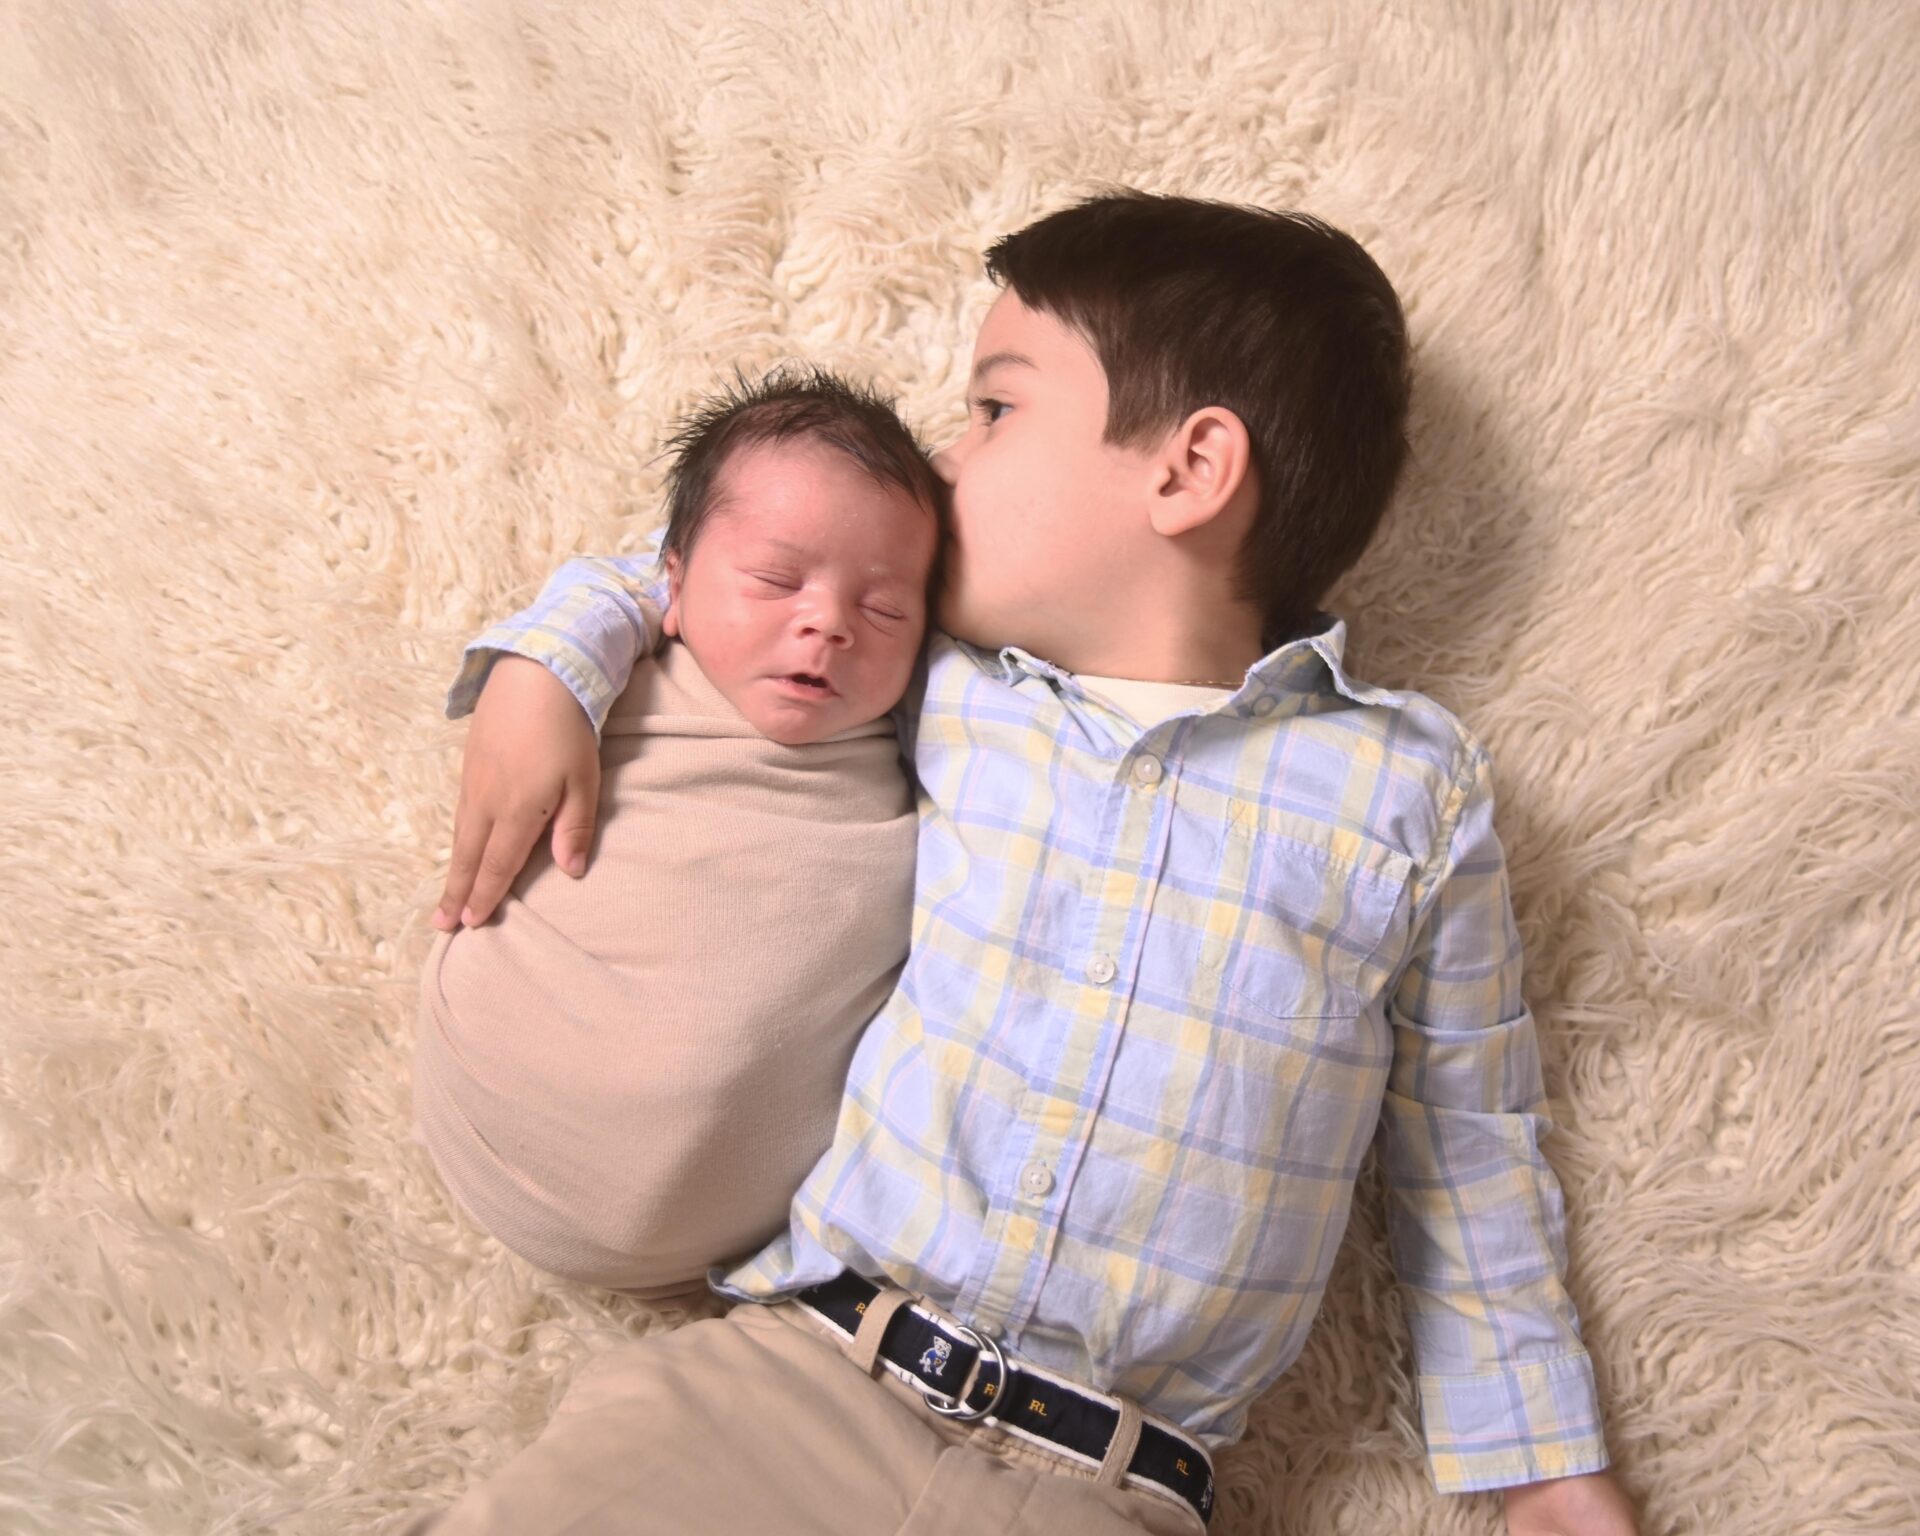
Alongside the solo shots of the baby, don’t forget to include family interactions! Involving siblings or parents can lead to some heartwarming moments that are priceless, bringing out genuine expressions and emotions that words can't fully describe. I love those candid shots where my older child leans in to give their baby sibling a kiss or when I’m stealing a moment to cuddle them both. It’s those images that really showcase the bond—and who wouldn't want to capture those moments forever?
Tips for Effective Shooting
- Set Your Camera to Burst Mode: This allows you to take several photos in quick succession. I can focus less on the perfect timing and just let the moment unfold.
- Explore Different Angles: Sometimes a simple shift in position can yield significantly different photos. Get low on the ground, or try shooting from above; you might be surprised at what works!
- Take a Break: If things get too chaotic or my baby isn't cooperating, I’ve learned that stepping away for a minute or two can help reset the mood. A few deep breaths—usually, we come back to it with fresh eyes.
While it might take several sessions of snapping away, each click of the camera becomes a step closer to capturing a cherished memory. I often remind myself that even if I walk away from a shoot with only a handful of good photos, I still get to witness and enjoy those fleeting moments in real time. Remembering that patience and persistence go hand-in-hand really enriches the experience.
And eventually, all those shots add up to a fantastic collection that tells a story. I genuinely believe there’s beauty in the process, the laughter during a failed shot, and the joy in the successful capture of those sweet, fleeting moments. Before you know it, those little ones are not so little anymore, and these photographs will become cherished treasures that remind us of those early days of their lives.
The Importance of Safety When Working with a Baby
When it comes to photographing babies, there’s nothing more vital than ensuring their safety and comfort. As I dive into the world of newborn photography, I often find myself thinking about a couple of key aspects: the baby’s mood and the involvement of the family. Let’s break down how we can create a delightful experience, one that captures these precious moments while keeping our little ones safe.
Understanding Baby’s Mood
First things first, let’s talk about the baby’s mood. A happy, well-fed, and rested baby is a joy to photograph. To ensure that your tiny subject is in the right frame of mind, there are a few tips I’ve found tremendously helpful:
- Feed Before the Shoot: A full tummy usually equals a happy baby! If you're planning a photo session, schedule it after a feeding. This way, your baby is less likely to fuss and more likely to do some cute poses.
- Comfort is Key: Make sure your little one is dressed in something comfortable. Soft fabrics and loose-fitting clothes can help them feel at ease, making it easier to capture their natural expressions.
- Naptime Guidance: Timing is everything! Try to plan your shoot when the baby is likely to be sleepy after a good nap. That sweet spot often leads to some of the best photos.
It’s fascinating how a child’s mood can change in an instant! Therefore, being flexible during your shoot can make all the difference.
Involving Family in the Experience
Another aspect that elevates baby photography is involving family members. Not only does this create a warm environment, but it also encourages beautiful interactions and expressions. Here’s how to make that happen:
- Capture Family Moments: Encourage parents and siblings to join in on the session. Getting them together promotes a sense of connection that can be beautifully captured. Imagine the joy of siblings making funny faces or parents gently cradling their baby!
- Creating Cherished Memories: Photos with family will be treasures in the years to come. Consider having a sibling hold the baby or even share a giggle with them. These candid moments often lead to the most captivating shots.
- Setting the Scene: Pick a spot at home where family can interact comfortably. A bright living room with natural light can do wonders for creating a relaxed atmosphere.
Getting those genuine smiles and interactions is about capturing real-life moments. Just think about the memories created from watching a sibling read to the baby or share a toy.
Keeping Safety at the Forefront
While focusing on capturing beautiful moments, let's not forget that safety comes first. Here are some essential tips to keep your little model safe:
- Utilize Safe Props: Ensure that any props used stay secure and won’t pose a risk. If you're using a basket or blanket, for example, check that they’re free from any sharp edges or loose parts.
- Support and Stability: Always provide support when posing the baby. It’s crucial to never leave them unattended, even for a second. Trust your instincts and never rush.
- Safe Surroundings: Keep the environment clutter-free with no hazards nearby. It hustles me to think about how easily danger can lurk from items we may overlook!
I've often found myself jotting down these safety pointers as reminders. An ounce of prevention is worth a pound of cure, right?
Final Thoughts on the Experience
Each of these sessions is not just about creating lasting memories but weaving stories that celebrate the arrival of a new life. The joy that a baby brings, the laughter of a sibling, and the love radiating from parents can only be captured when everyone feels safe and comfortable. So, when you're about to embark on your photography journey, remember these little nuggets of wisdom. They are your ticket to creating not just pictures, but stories you'll cherish forever.
Conclusion
When I think back to those first few weeks of my baby’s life, it’s a bittersweet reminder of how quickly time flies. Capturing those precious newborn moments at home turned out to be one of the most rewarding experiences I’ve had as a parent. The value of DIY newborn photography cannot be overstated! Not only does it save you from spending a fortune on professional sessions, but it also allows you to create lasting memories in a comfortable and familiar environment.
If you’re on the fence about giving it a shot, let me tell you why it’s totally worth it. First off, taking newborn photos at home lets you capture those fleeting moments exactly as they happen. Those little fingers, tiny toes, and that adorable sleepy face are things we all want to remember. I took countless photos of my little one dozing off in a cozy blanket, and every time I look back, I’m transported right back to that moment. It’s a treasure trove of memories that brings a smile to my face even on the toughest of days.
But maybe the best thing about it? There are no glaring studio lights or stiff poses. You have the freedom to control the atmosphere and the setting. Want to throw in a favorite stuffed animal or a family heirloom blanket? Go for it! You can also choose the time of day that works best for you and your baby—bonus points for the soft natural light that everyone loves in photos!
Now, I totally get it—some parents might feel overwhelmed at the thought of snapping great shots on their own. Trust me, it's not as daunting as it may seem. Instead of putting pressure on yourself to achieve perfection, think of it as a fun project. All you need is a bit of confidence and a willingness to experiment. You’re not just taking photos; you’re creating art that reflects your family’s unique style and story.
Here’s a little secret: you don’t have to worry if your first few shots aren’t Instagram-worthy. My initial attempts were far from perfect; I had blurry pictures and awkward angles. But guess what? With each click, I learned more about light, composition, and what captured my baby’s essence the best. Just like most things in life, practice makes progress!
And let’s not forget the bonding that happens during those little photo sessions. Imagine cradling your baby, adjusting that cute headband you made, or carefully arranging a beloved toy nearby. You’re not just taking pictures; you’re creating a scrapbook of special moments that showcase the love and connection between you and your little one. And that joy is irreplaceable!
Now, I can’t emphasize enough how important remembering the essence of those moments is. Sure, there might be rough days when your baby isn’t in the mood, or unexpected messes (because let's be honest, babies can be unpredictable). But don't let those moments discourage you. Taking multiple shots is key, and sometimes the best images happen when you least expect them. I’ve had gorgeous candid smiles and sleepy cuddles caught during those “oops” moments, and those became my favorites!
Once you look back and see your efforts pay off, you’ll feel proud of capturing memories that mean the world to you. So I encourage all parents out there to grab your camera or phone and start snapping away! There’s a world of memories waiting for you to capture, and it can all unfold right in your living room.
In the end, whether you’re a seasoned pro or a complete novice, DIY newborn photography is not just about the photos you take, but the love you pour into those moments. Embrace the chaos, the cuddles, and the cuteness—because, honestly, that combination is pure magic.
```html
Call to Action (CTA)
Now that we've covered the essentials of capturing those adorable DIY newborn photos, I can’t help but feel excited about what you’re all going to create! Remember, these moments are fleeting. One minute, your little one is tiny enough to fit in your arms, and the next, they’re running around the house! So why not seize the moment and share the beauty of this stage with the world?
First off, I urge you to grab your cameras and start snapping away. When you capture those sweet DIY photos, don't keep them to yourself! Share them on social media for everyone to see. There's something special about sharing your work with a community that appreciates the effort behind it. Plus, it’s a great way to inspire other parents who might be hesitant to take the plunge into DIY photography.
But let’s be real for a second. While DIY photography is super rewarding and fun, I know that some of you might want a more polished look for those milestone moments. That's where professional photography services come in. Capturing the essence of your family, especially those beautiful portraits, is what I do best. Whether it’s for a milestone birthday, a family portrait, or just a fun day in the park, investing in a professional session can be a great way to freeze those moments forever. Think of it as an investment in memories!
And if you're wondering whether hiring a pro is really necessary, let me share some insights. According to a study from the Photography Association, families that opt for professional newborn photography treasure their images significantly more than DIY shots, often citing the professionally framed images as enhancing their home decor. We all want to look back on these precious moments with beautiful photographs, right? It’s completely understandable if you want a top-notch job done when those milestones sneak up on you.
Now, for those of you who are enjoying this DIY adventure and can’t get enough of these tips, why not take it a step further? I invite you to subscribe to my blog or follow me on social media! I’m always sharing more photography tips, inspiration, and sometimes even behind-the-scenes peeks of my shoots. Let’s build this community together! I love seeing your work and being a part of your photography journey.
In summary, my call to action for you is two-fold: First, go out there and take some candid shots of your little ones, then share them with the world. And second, consider reaching out for professional services when the time feels right. Whether it's highlighting their first birthday or documenting a family moment, I’m here for you. So grab that camera and let’s see what you come up with!
Happy photographing! Don’t forget to subscribe for more tips, and keep those cameras clicking! I can’t wait to connect with you.
```