To achieve your photography goals, it is crucial to have a good understanding of the fundamental camera settings. Take the time to learn and master aperture, shutter speed, and ISO, as they can greatly enhance the visual impact and meaning of your photographs. Avoid common mistakes by using autofocus correctly and experimenting with manual mode for improved image quality. As a beginner in this field, explore the vast potential of camera settings and let these tools unleash your artistic vision with every shot you capture.
Aperture, Shutter Speed, and ISO Explained
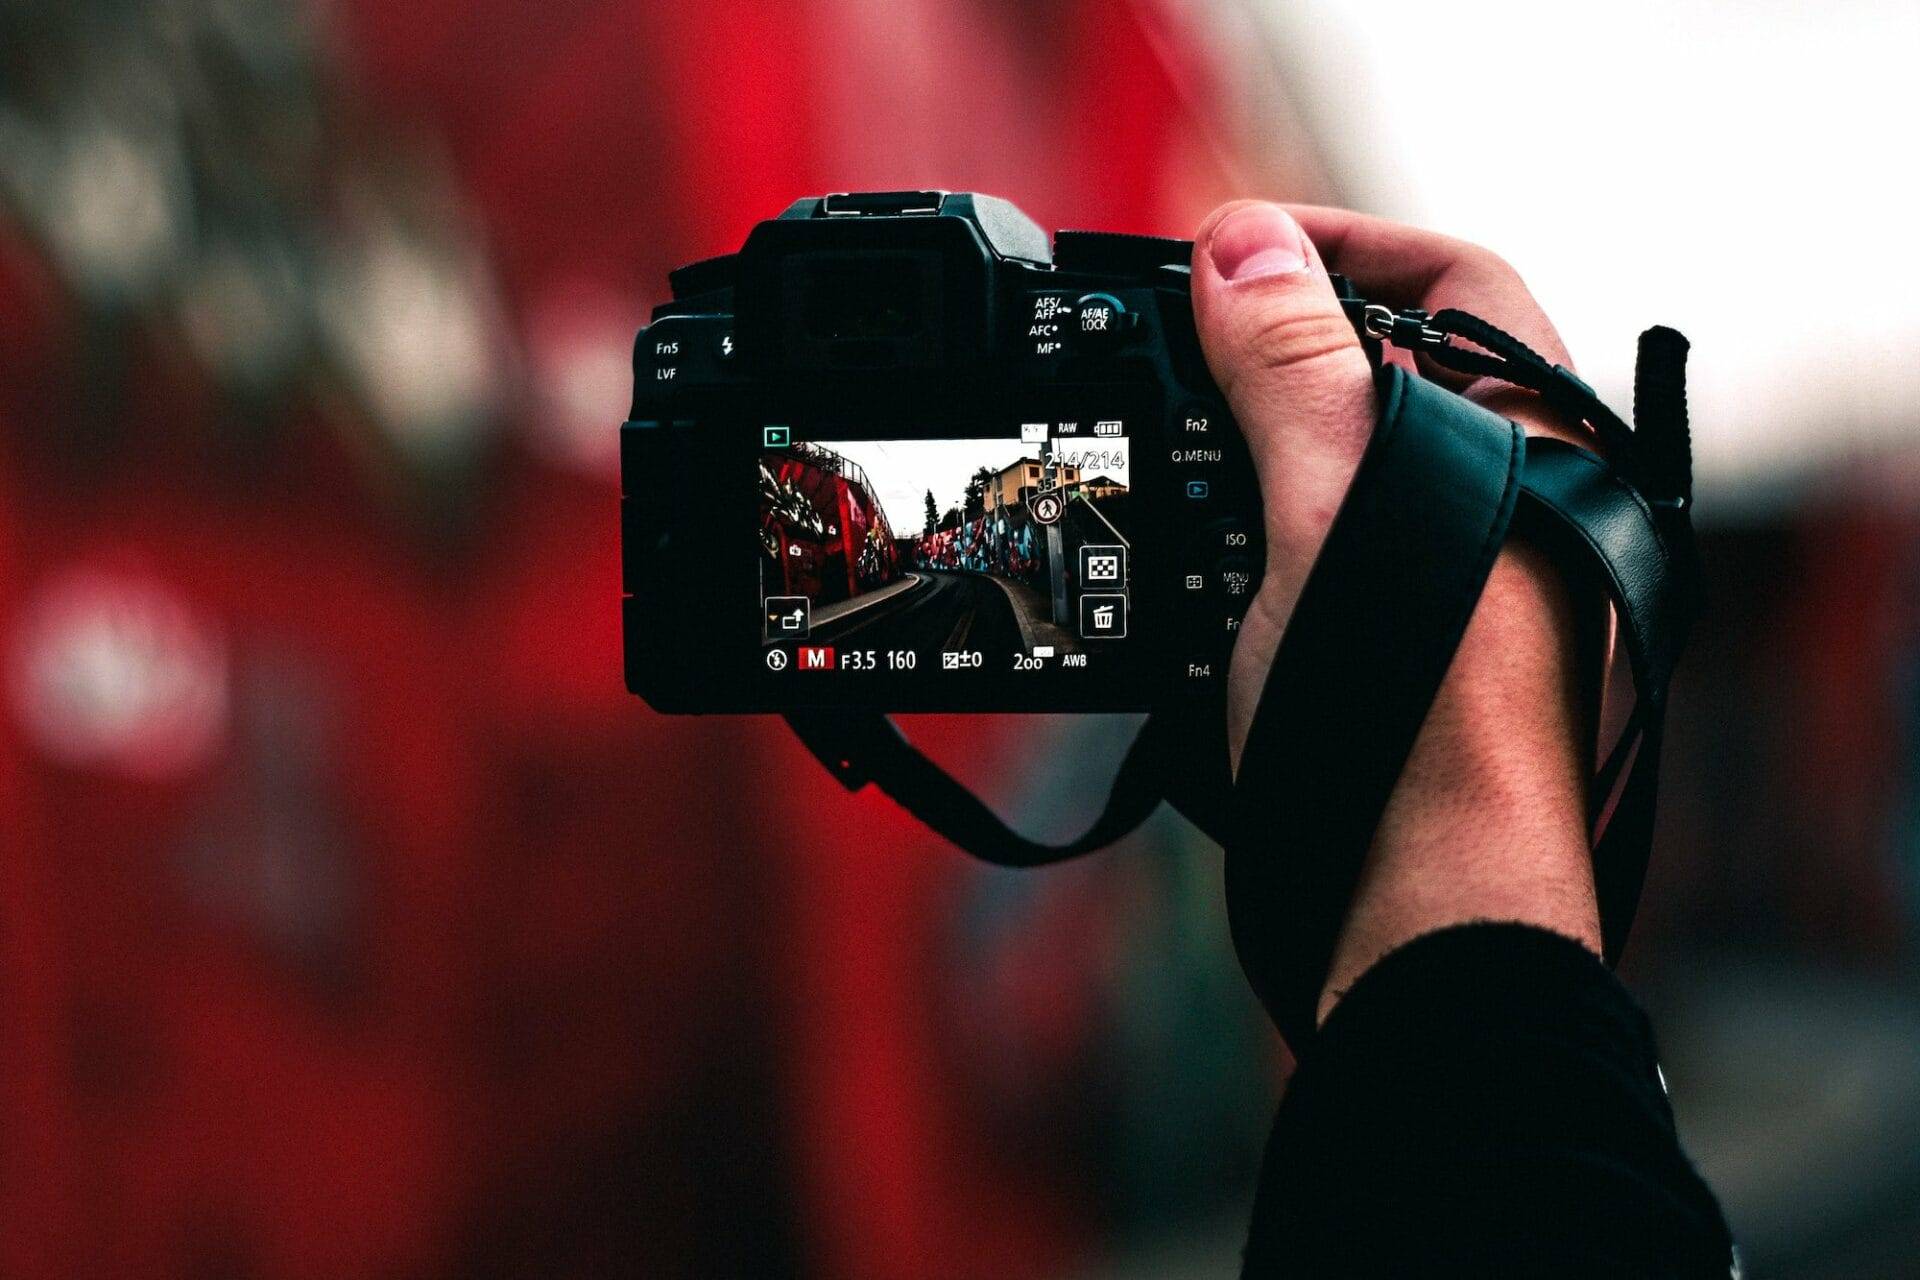
Exploring the realm of photography demands a firm grasp on key camera settings for top-notch snapshots. Among these are RAW image quality, auto white balance, and metering mode [1]. Take RAW image quality; it snags shots packed with data, making post-edit tweaks more fruitful. In tough light? The RAW format’s your friend for nailing white balance and exposure adjustments afterward—hello, better pics! Auto white balance fixes color temps in your shots by reading the light; this shines when you’re hopping from inside to outside scenes. Plus, how your camera reads light—the metering mode—affects photo brightness levels. A solid grip on these basics will help nail those perfect shots.
Also critical: active d-lighting plus lens fixes that boost image sharpness. Say you’re snapping a varied landscape scene—active d-lighting saves details from bright skies to dark ground bits, crafting balanced beauties.

Adjusting Camera Settings for Different Lighting Conditions
Let’s not forget Aperture alongside shutter speed and ISO—they mold your photos’ final look big time. Aperture’s f-stop scale controls incoming light levels and shapes depth of field—that lovely blur or crispness behind subjects. Picture this: using f/2.8 in a portrait throws the backdrop into soft focus while spotlighting your subject sharply—an eye-catching effect! Getting how aperture influences both lighting and depth of field is clutch for those spot-on focused effects in imagery.
Tips for Getting the Best Results with Camera Settings
To grasp the core of photography, one must be adept at using the key settings: aperture, shutter speed, and ISO. This knowledge sets you free to create art that truly reflects your vision. Shift from auto to manual mode for full creative control—this move alone can transform your work into something remarkable. Picture this: during golden hour, tweaking each dial manually lets you capture a landscape with just the right mix of light and dark. The result? A stunning scene with every detail finely balanced.
Also critical is knowing how sRGB color space affects image quality—for colors in your shots need to look true to life. Dive into these ideas; tweak camera options accordingly for top-notch results consistently. Take images meant for web display; convert them into sRGB format so they show true on screens everywhere—your photos stay authentic.

Common Mistakes to Avoid
In this field, avoid traps that could ruin a great shot. Don’t get stuck in auto mode—it’s stifling creativity-wise and doesn’t harness all camera features well enough. Beware high ISO woes too; it’s vital for keeping pictures clear without unwanted graininess or noise specks marring them (like what happens when you shoot in dim light at ISO 3200).
Further still, blown-out bright spots are often photo spoilers; hence balancing exposure counts for heaps in making shots pop with visual punch and appeal—case in point: capturing sunsets where well-exposed skies make all the difference. By dodging these common slip-ups and staying sharp on essential theories like the impact of sRGB color space or drawbacks of cranking up ISO settings—you’re set to craft striking visuals that captivate viewers’ gazes.
Autofocus Mode and Subject Considerations
ISO sets how much light the camera’s sensor can take in. This shapes image glow and crispness. With low ISO, you get less grain; with high ISO, more light but possible speckles appear. Take shooting in dim spots: crank up your ISO to something like 1600. You’ll keep a swift shutter speed and snap motion well, all while keeping your shot bright.
Achieving Creative Freedom with Camera Settings
The time the shutter stays open? That’s what we call shutter speed. It helps grab movement or blur it for effect in snaps. Varying speeds either stop quick moves cold or blend them into a blur for art’s sake. Let’s not forget: there’s gain from knowing when aperture priority mode does best (or doesn’t). Say you’re after a fast bird – go with 1/1000s to catch that bird mid-air, crisp and clear.
Manual Mode vs. Auto Mode
Switching up camera tweaks for different lights is key to ace shots. Mess around with aperture, shutter speed, and ISO – each change alters image feel by heaps! Auto ISO shifts things on its own—catches brightness changes plus action too (without fuss!). Example: on a sunny day out, it might drop the ISO so overblown whites don’t ruin your pic. Long exposure noise reduction? It cleans up shots taken over long spells—think night skies—with less fuzziness involved (that means cleaner pics). If you’re doing long exposures at night—and flip this feature on—you fight off digital fuzz so what comes out looks sharp and draws eyes in easy-like. Get good at tweaking settings no matter where you shoot—it’s clutch for photos that wow across all scenes. Switching up camera tweaks for different lights is key to ace shots. Mess around with aperture, shutter speed, and ISO – each change alters image feel by heaps! Auto ISO shifts things on its own—catches brightness changes plus action too (without fuss!). Example: on a sunny day out, it might drop the ISO so overblown whites don’t ruin your pic. Long exposure noise reduction? It cleans up shots taken over long spells—think night skies—with less fuzziness involved (that means cleaner pics). If you’re doing long exposures at night—and flip this feature on—you fight off digital fuzz so what comes out looks sharp and draws eyes in easy-like. Get good at tweaking settings no matter where you shoot—it’s clutch for photos that wow across all scenes.
When shooting in different lighting conditions, make sure to experiment with your camera settings such as aperture, shutter speed, and ISO. Each adjustment can significantly change the overall look and feel of your images. The Auto ISO feature can be especially helpful as it automatically adjusts the ISO based on changes in brightness and movement, ensuring that you capture well-exposed and sharp photos without any hassle. For example, when shooting on a sunny day, the camera may lower the ISO to prevent overexposed highlights.
Another useful feature to consider is long exposure noise reduction. This setting helps clean up any noise or graininess in photos taken during long exposures, particularly when capturing night skies or low-light scenes. By enabling this feature, you can achieve cleaner and sharper images without unwanted digital artifacts.
Remember to practice adjusting these settings regardless of where you’re shooting. Mastering them will greatly enhance your ability to capture stunning photos in any environment or situation.
Mastering the right autofocus setup can turn a dull shot into one that’s crisp and full of life. Opt for single area focus when your target stays still; switch to continuous/AI servo for those on the move to ensure top-notch clarity and sharpness. Knowing how aperture tweaks affect both image detail and background haze proves key in getting your subject just right—with either standout clarity or soft, dreamy backdrops.
Say you’re catching an athlete mid-sprint: pick continuous/AI servo so your camera keeps up, keeping them clear-cut against the rush of their movement. Learn well how aperture, ISO, and shutter speed work; these tools hand you keys to unlock boundless artistic paths. Use them smartly (leveraging is your friend), crafting shots that sing with personal style or tell stories words alone can’t match.
Turn to Scene Mode: Enhancing Your Captures
When it comes to capturing the perfect shot, scene mode is your go-to feature. By selecting the appropriate scene mode, you can effortlessly enhance the quality of your photos and make every element truly stand out.
Let’s imagine you’re taking a portrait of someone. By choosing the right scene mode, you’ll witness how it fine-tunes each setting to perfection. The result? A picture that not only captures their appearance but also their essence.
Differentiating between auto and manual modes is crucial for aspiring photographers. While auto mode may be convenient, manual mode offers the freedom to have complete control over every aspect of your shot. This is where true artistry behind the lens lies. Don’t underestimate the power of aperture priority in this regard.
When it comes to landscapes filled with contrasting lights and darks, only manual mode allows you to adjust the exposure precisely. This way, you can capture all the intricate details across different shades without compromising the overall balance. The end result? A visually stunning masterpiece.
To further enhance your photography skills, consider the following tips:
- Choose the autofocus type wisely.
- Take control of your aperture choices.
- Experiment with ISO and shutter speeds creatively.
- Utilize scene modes smartly based on the subject type.
By following these guidelines, you’ll be well on your way to capturing breathtaking photos that truly reflect your unique vision.
In addition to scene modes, another important aspect to consider is the use of filters. Filters can add a touch of creativity and enhance the mood of your photos. Experiment with different filters such as polarizers or neutral density filters to achieve stunning effects. Don’t be afraid to think outside the box and try new techniques to elevate your photography to the next level. Remember, the key is to have fun and let your creativity shine through in every shot.