As a newborn photographer, I’ve always been captivated by the delicate vulnerability of infants. On one of my early shoots, I experimented with a soft, knitted blanket, and the way it cradled the baby made me realize the importance of textures in completing the frame. Textures don’t just enhance aesthetics; they add depth and life to a photograph. In this post, I will share how you can masterfully weave textures into your newborn photography to elevate your images. Get ready to bring your photos to life!
Understanding Textures and Their Importance in Photography
Textures play a pivotal role in photography. They can transform a simple image into a breathtaking piece of art. When I first started taking photos, I realized how much I was drawn to the textures in my surroundings. The roughness of a wooden surface. The softness of a child’s blanket. These elements don’t just fill the frame; they tell a story.
The Role of Textures in Creating Visual Storytelling
Visual storytelling is about communicating emotions and narratives through images. Textures are like the brush strokes in a painting. They add depth and character. Think of it this way: a photo of a smooth, empty beach might evoke peace, but adding the texture of jagged rocks or footprints in the sand changes the story entirely. It sparks curiosity, inviting viewers to ask questions.
- Textures create contrast: Using rough and smooth surfaces can guide the viewer’s eyes.
- Layering textures: Incorporating multiple textures can create a sense of richness.
- Textured backgrounds: They can enhance the subject and provide context.
If you ever find yourself unsure of what makes your photos engaging, think about the surfaces around you. Whether it’s the ripples in a pond or the fine threads of a fabric, each texture has the potential to narrate a different story in your photograph.
Why Textures Can Evoke Emotions in Photographs
Every time I pick up my camera, I think about how textures influence emotions. It’s fascinating! For example, an image featuring warm, fuzzy blankets typically evokes feelings of comfort and safety. Conversely, a jagged stone wall might stir feelings of loneliness or isolation. So why do certain textures have such a profound impact on our emotions?
| Texture Type | Associated Emotion |
|---|---|
| Soft fabric | Comfort, warmth |
| Rough surfaces | Tension, discomfort |
| Natural elements | Calmness, connection |
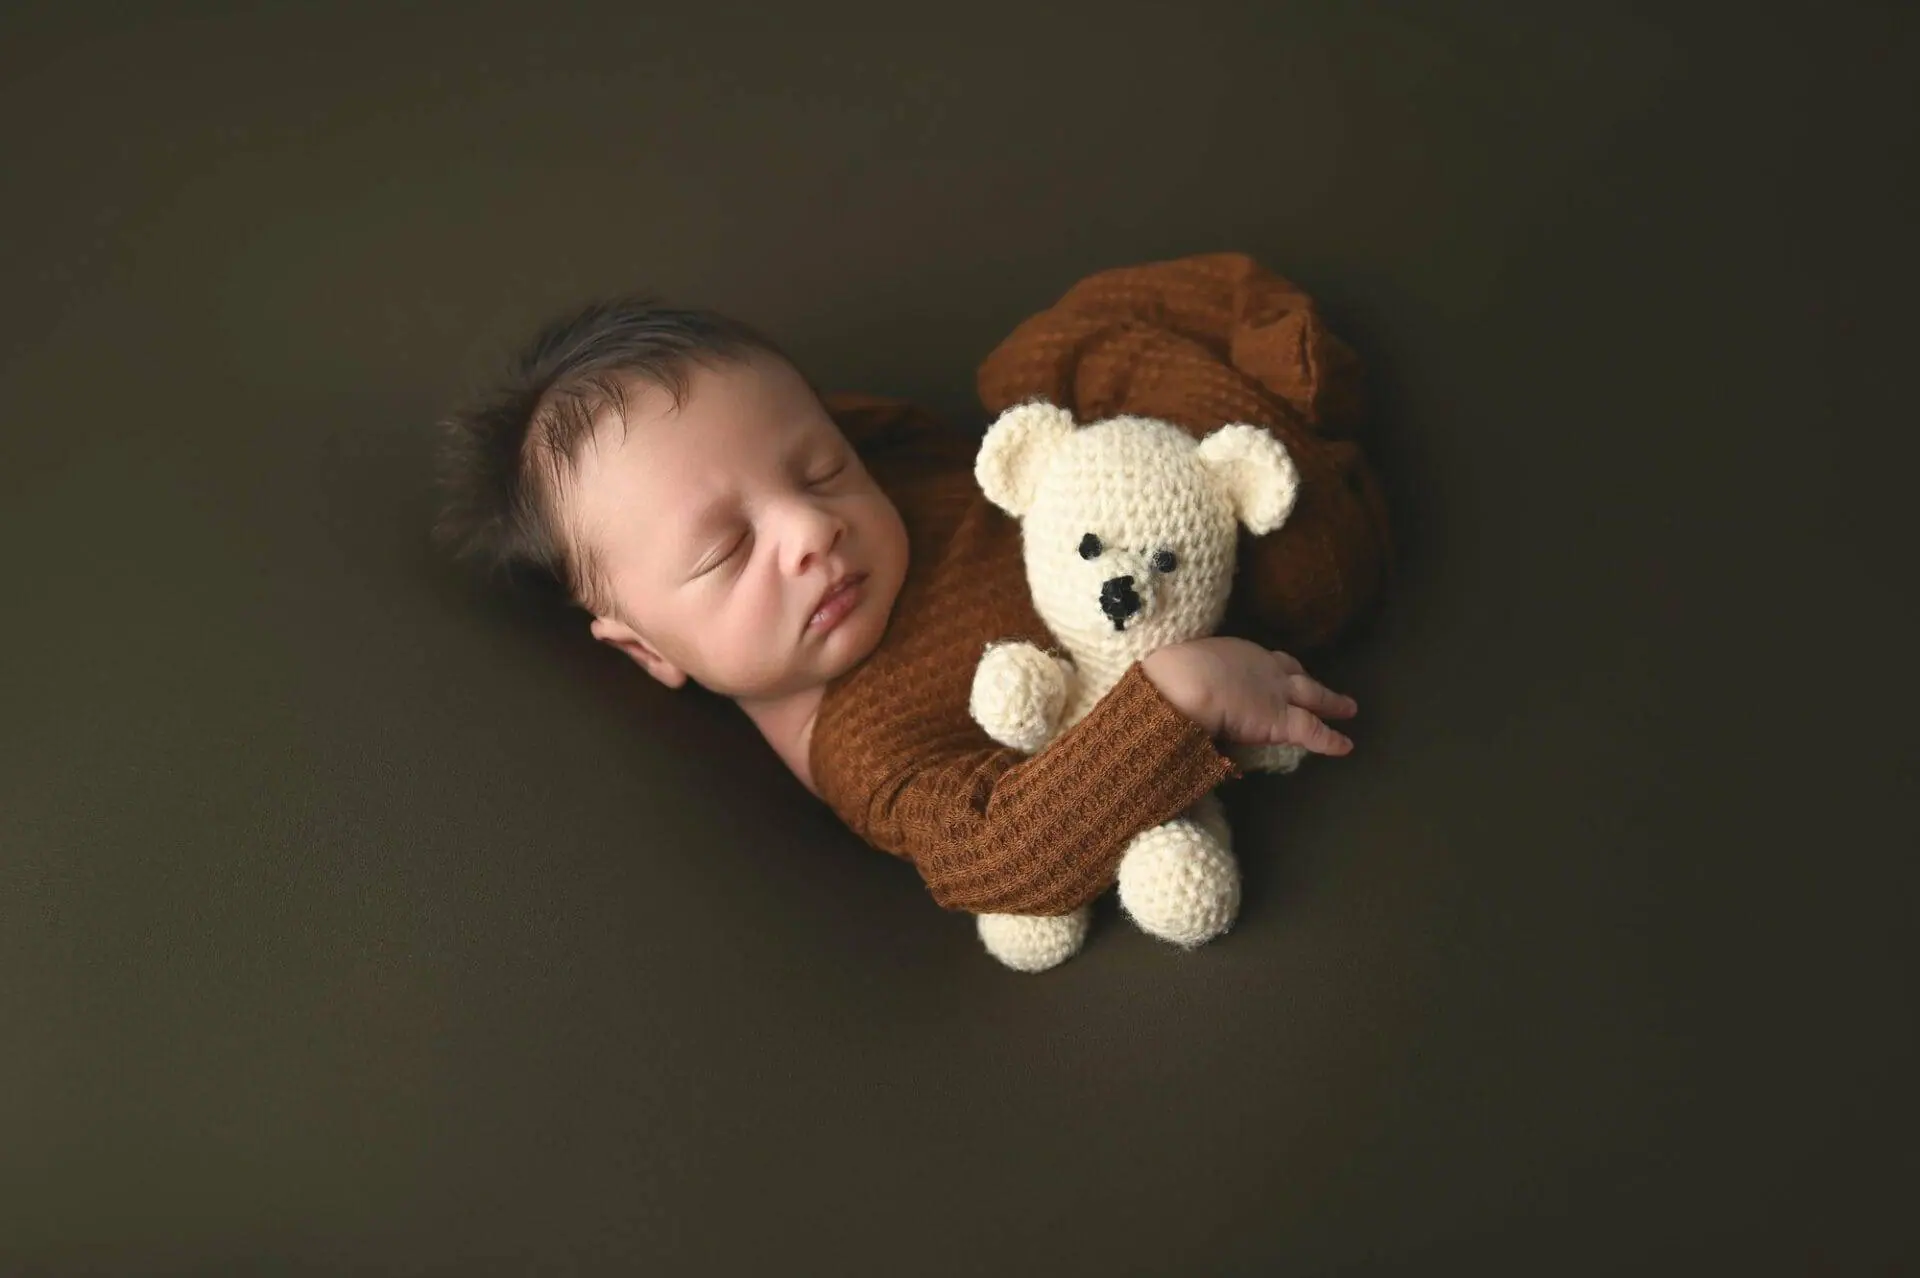
When we connect with a photograph on an emotional level, it draws us in. We become part of that story. For instance, think of a picture of a baby sleeping on a knitted blanket. The texture conveys softness and warmth, evoking a natural sense of peace and tenderness. Does the texture enhance your emotional experience with the photo? I believe it does.
Personal Experiences with How Textures Enhanced My Own Photography
Textures truly changed the way I shoot photos. I remember my first attempt at newborn photography. I was nervous. Newborns are delicate, and every choice matters. I found that introducing soft fabrics for blankets made the most significant impact. When I wrapped the baby in a gentle, knitted blanket, I could feel the warmth radiating through the lens. It was magical.
One particular session stands out. I layered different textures—soft wool blankets with rustic wooden props, and it was stunning! The juxtaposition of cozy softness against the rough grain of wood created a visual story that resonated with viewers. It made them feel something significant.
“Textures are the silent storytellers in a photograph. They evoke emotions, connect viewers to the scene, and transform ordinary images into profound experiences.” – Unknown
Moreover, when I experimented with different backgrounds, the results were astounding. I used textured backdrops made of burlap and lace that added richness to the portraits. They drew attention to the subject while maintaining an enchanting atmosphere around them. It was through playing with textures that I finally found my photographic voice.
Lighting also plays a crucial part. I learned how to highlight textures using soft, diffused light. This technique showcases textures while ensuring my subjects stay comfortable. And trust me, it makes a world of difference. If you think about light in your photography, it could change everything!
What You Can Try
If you’re like me and want to delve into the world of textures, here’s what I suggest:
- Explore Different Surfaces: Look around you! You’ll find textures everywhere—walls, fabrics, nature.
- Experiment with Layers: Combine various textures, and see how they interact with each other.
- Play with Light: Adjust your lighting to see how it accentuates textures in your photos.
- Take Risks: Don’t be afraid to try unconventional backgrounds or props!
Textures are more than a mere visual element. They create depth, tell a story, and evoke emotions. I encourage you to explore textures in your photography and to find the stories they can tell. The world of textures awaits—what will your camera capture next?
Diving into Different Types of Textures
Exploring Fabric Textures
When it comes to textures, fabric is one of the most diverse and engaging categories. Think about it. We encounter various fabric textures every day, but their impact often goes unnoticed. This is especially true in photography, where textures can transform a simple image into something extraordinary.
Let’s discuss some popular fabric textures:
- Soft Cotton: Lightweight, breathable, and oh-so-soft. Cotton feels incredible against the skin. In newborn photography, cotton wraps are perfect. They are gentle, ensuring the baby’s comfort while adding visual appeal.
- Wool: This is another fantastic fabric, especially knitted wool. It’s thicker and brings warmth. The lush texture of a knitted wool blanket creates a cozy environment. It’s inviting and can evoke feelings of warmth and security.
Using these fabrics strategically can change the entire atmosphere of a photograph. Imagine a soft cotton wrap swathed around a sleeping baby. Or a beautifully knitted blanket under a tiny head. Such details contribute so much to the overall visual interest.
Natural Textures from Elements
Now, let’s step outside and think about the textures that nature provides. Natural textures from elements like wood and stones enrich our surroundings. They tell a story. Each piece of wood carries a history within its grains, while stones reflect the rugged beauty of the outdoors.
- Wooden Props: Crates, bowls, and rustic beds add character. Their uneven surfaces and grains provide depth. It’s like bringing a piece of the outdoors inside.
- Stone Elements: Rocks and pebbles can also play a role. They offer a raw texture, showcasing the unrefined beauty of nature. Combined with fabric, they create a stunning contrast.
Don’t forget about the aesthetic impact. A beautiful wooden crate can serve dual purposes; as both a background element and a prop. It not only supports the baby safely but also enhances the image’s charm. Where else can you find this blend of utility and beauty?
Functional Props that Enhance Character
As much as we love natural and fabric textures, functional props play a crucial role too. They can breathe personality into a scene. Consider props such as hats, headbands, and toys.
- Hats and Headbands: These accessories add a pop of texture and color. They are delightful, providing character to any photograph. Plus, they can be personalized to suit the baby’s style or theme.
- Stuffed Animals: Incorporating plush toys can create a playful atmosphere. They not only enhance visual interest but are also comforting for the baby.
What’s the point of a photograph if it lacks personality? Props allow for a touch of whimsy. They engage the viewer’s eye and draw them into the story the image tells.
Table of Textures Comparison
| Texture Type | Description | Benefit |
|---|---|---|
| Soft Cotton | Lightweight and breathable fabric. | Comfortable against baby’s skin. |
| Wool | Lush and warm knitted fabric. | Creates a cozy and inviting feel. |
| Wood | Natural, rustic material. | Adds character and depth to photographs. |
| Stone | Raw, natural elements. | Provides contrast to softer materials. |
| Hats | Textured accessories for babies. | Adds personality and flair. |
| Toys | Playful, soft plush items. | Enhances the scene with comfort. |
Incorporating Textures Thoughtfully
When combining different textures, consider layering. By stacking fabrics, natural elements, and props, you create depth. Visual depth is essential because it leads the viewer’s eye throughout the photograph. It feels more alive and engaging.
Don’t forget about color coordination. Does your backdrop complement your fabrics? A well-coordinated setup pops out to the viewer, drawing their attention where you want it.
Why Textures Matter
I often wonder why textures have such a profound impact on our perceptions. They elevate the ordinary. They create mood. Would you rather look at something flat and lifeless or vibrant and textured? Exactly.
Textures do not just enhance aesthetics. They tell a story, evoke emotions, and capture moments forever. The careful selection of textures—whether it’s soft cotton, rustic wood, or playful hats—can truly change the narrative in your photography. It’s time to dive deep into this wonderful world of textures and see what magic it brings!
Proven Techniques for Texture Integration
Textures can significantly enhance our visual storytelling, especially in photography. They create depth, interest, and emotions in every shot. In this section, I want to dive into some of the vital techniques that can help you integrate textures effectively. We’ll explore three main areas: layering textures to add depth, using creative backgrounds and backdrops, and the magic of lighting and shadows on textures.
1. Layering Textures to Add Depth
Have you ever looked at a photograph and felt drawn in, almost as if you could reach out and touch it? That’s the power of layering textures!
When we talk about layering, it’s about combining different textures in a way that feels harmonious. This approach not only adds visual interest but also creates a sense of dimension. So, how do we achieve this? Let’s dive into the nitty-gritty.
- Choosing the Right Textures: Every texture has its character. Consider using fabrics like plush blankets or knitted items for a soft, inviting feel.
- Color Coordination: Think about the color wheel. Complementary colors can make textures pop. For instance, a deep burgundy cloth can elevate the softness of beige blankets.
- Create Layers: Start with a base layer—a blanket—and add another texture, such as a knitted wrap or a faux fur on top. This technique can create a wonderful depth that engages viewers.
When layering, one question often comes to mind: How can I be sure that the layers work well together? A simple trick I use is to test arrangements before the shoot. It might feel a bit cumbersome at first, but a quick layout can save you hours of editing later.
2. Using Creative Backgrounds and Backdrops
Next up is the importance of backgrounds and backdrops. A textured backdrop can be a game changer for your photos. Instead of plain curtains, consider using surfaces with patterns or intricate designs.
- Textured Backdrops: A backdrop with soft, muted textures can enhance the subject without overwhelming it. Think of a watercolor wash or subtle linen.
- Natural Settings: Taking your photos outdoors? Look for natural elements, like wood or stone, to add an organic feel. Incorporating these can evoke a sense of warmth and authenticity.
What about the backdrop you use? Consider this: a rustic wooden fence can tell a story just as much as the baby you’re photographing. The right backdrop can elevate a moment, transforming it into a memory. So ask yourself: What story do I want my backdrop to tell?
3. The Magic of Lighting and Shadows on Textures
Let’s not forget the crucial role that lighting plays. Natural light can be incredibly forgiving. It highlights textures, casting gentle shadows that add dimension.
- Highlighting Textures: Using side lighting can increase the visibility of textures. Positioning your light source to the side can help create subtle shadows that bring out depth.
- Soft Lighting: Always ensure the environment is comfortable for your subjects—especially newborns. Soft, diffused light not only comforts tiny models but also enhances textures beautifully.
Have you noticed how light can transform the appearance of textures? The same textured fabric can look completely different under harsh versus soft light. Experimenting with light settings is vital. Remember, sometimes even the small things—a right angle or a slight shift in light—can dramatically change the scene.
Quick Tips for Working with Textures
| Technique | Benefits |
|---|---|
| Layering Textures | Creates depth and visual interest |
| Creative Backgrounds | Enhances storytelling through environment |
| Using Lighting Effectively | Accentuates depth and elevates textures |
Incorporating textures isn’t just a technique; it can completely redefine your photos. By experimenting and being mindful of how textures interact, you can elevate your composition significantly. It’s all about a balance—too much texture can overwhelm, while too little can lead to flat visuals.
In the end, remember that integrating textures is about personal expression. Each photograph tells a unique story, and textures can be the subtle hints that transform a simple shot into something extraordinary. So, get out there! Explore different textures and see where they take you.
Navigating Safety with Textures
Selecting Baby-Safe Materials for Props
When it comes to newborn photography, selecting the right materials is crucial. After all, we want every little one to feel cozy and secure. But the question is: *How do we decide what’s safe?* Here’s a rundown of some baby-safe materials:
- Soft Fabrics: Consider using cotton or muslin. These are gentle on delicate skin and easy to wash.
- Natural Fibers: Linen, bamboo, and wool can be great choices too. They provide breathability and are less likely to irritate the baby’s skin.
- Non-toxic Paints: If you’re using props that have been painted, ensure the paints are non-toxic and lead-free.
- Earth-friendly Materials: Biodegradable and recycled materials can also be considered for environmentally-conscious choices.
- Thick Padding: Use props with thick, plush padding. This not only keeps the baby comfortable but also prevents any hard edges from causing injury.
It’s also essential to double-check for any loose parts on props that can pose choking hazards. A smooth surface with no sharp objects is what we want.
Maintaining Comfort During Photoshoots
Comfort is king when working with newborns. These tiny humans are sensitive to temperature, texture, and even sound. So, how can we accommodate their comfort? I’ve put together a few practical tips:
- Temperature Control: Keep the room warm. Babies often get cold easily, which can lead to discomfort and fussiness. A cozy room helps them relax and stay calm.
- Positioning: Avoid awkward or unsafe poses. Always ensure the baby’s head and neck are well supported. If a pose doesn’t feel safe, give it up!
- Soft Textures: Wrap your little ones in soft blankets to prevent rough textures from being uncomfortable against their skin. Remember, soft textures can also elevate the visual appeal!
- Take Breaks: Babies can’t be kept in a position for too long. Regular breaks are essential. Feed, change, or just cuddle your little subject to give them the attention they need.
These simple practices can make a big difference. Ensuring comfort can help us capture those beautiful moments without the stress of a fussy baby.
Support Techniques While Using Various Textures for Safety
Texture can enrich our images by adding dimension and complexity. But how can we incorporate different textures while ensuring safety? Here are some support techniques:
- Layering Textures: Layering can create a gorgeous depth. For example, place a soft blanket under a textured wrap. This provides visual interest while ensuring safety.
- Using Props Wisely: When using props, ensure they are stable and safe. A soft basket is better than a hard one, and always make sure the baby is secure.
Below is a simple table summarizing the textures vs. their support:
| Texture Type | Safety Considerations |
|---|---|
| Soft Fabrics | Gentle on skin, washable |
| Wooden Props | Ensure no splinters, and padded support |
| Natural Elements | Check for allergens, soft surfaces only |
| Knitted Items | Ensure no loose threads, secure fit |
By following these techniques, we can enhance the visual appeal of our photography while keeping safety at the forefront.
Incorporating Safety into Creativity
It can feel like a balancing act—*How do you create beautiful images while ensuring baby’s safety?* You don’t have to compromise on creativity when using textures. We bring warmth and depth by thoughtfully selecting materials and props. This process can elevate our art while keeping our littlest subjects safe.
Safety isn’t just a checklist; it’s a vital part of the experience. Engaging the parents is also crucial. Open communication ensures everyone is on the same page. We want them to feel reassured about the comfort and safety of their newborn.
While working with newborns presents unique challenges, incorporating safety protocols when using various textures isn’t just necessary; it’s essential. In the beautiful world of newborn photography, we learn that the most crucial part of our job isn’t just clicking the shutter—it’s ensuring that we honor and protect these precious little lives.
So next time you’re setting up for a shoot, keep these tips in mind. By prioritizing safety in our creative process, we not only enhance our work but we also offer parents peace of mind. Let’s make every photoshoot a joyful experience for both the baby and the photographer.
Post-Processing: Elevating Textures to Their Full Potential
Have you ever looked at a photograph and felt like you could just reach out and touch it? That tactile sensation often comes from well-executed textures. In photography, textures can add depth, character, and intimacy to an image. Especially in newborn photography, where capturing the softness and warmth of the subject is essential, textures play a critical role. However, the right tools and techniques will help you elevate these textures to their fullest potential during post-processing.
Using Editing Software to Enhance Textures Effectively
Editing software is a photographer’s best friend. Programs like Adobe Lightroom and Photoshop offer a myriad of tools to enhance textures. But how do we use them effectively? Here are some steps you can take:
- Contrast Enhancements: Adjusting the contrast can significantly enhance textures. When you increase the contrast, the textures pop out more. Remember, subtlety is key—too much can lead to harsh images.
- Clarity and Texture Sliders: These sliders allow you to bring forth fine details. Use the
Textureslider to enhance detailed elements of your image. TheClarityslider affects midtone contrast, which adds depth without making the image look artificial. - Sharpening: This tool can be beneficial, but be careful! Over-sharpening can lead to a grainy look. Aim for a gentle increase that preserves the softness of the baby’s skin while still making other elements stand out.
Utilizing these tools effectively will help you create a polished final product. One quote that comes to mind is, “It’s all in the details.” Every enhancement should point back to what makes the photograph unique and engaging.
Maintaining the Integrity of Natural Textures
When we think of texture enhancement, it might be easy to get carried away. However, maintaining the integrity of natural textures is crucial. Here are some tips for keeping it real:
- Preserve Natural Colors: When altering textures, keep the colors close to reality. For instance, if you have a soft blanket wrapped around a newborn, boost the colors slightly, but avoid making them overly saturated.
- Limit Use of Filters: Filters can be amazing, but some can drown out the finer details of the textures. Use them sparingly and look for filters that enhance rather than mask.
- Regular Comparisons: As you edit, continually compare your work against the original photo. Are you losing what made it beautiful in the first place? If so, dial it back.
You want to ensure that the photograph reflects the subject and atmosphere authentically. Think about it—how would you feel if you received a photograph that didn’t quite represent the moment? It can feel disingenuous. Aim to maintain an authentic feel while enhancing the visual impact.
The Fine Line Between Enhancing and Overpowering the Photograph
Finding that balance between enhancement and over-processing can be tricky. How do you know when you’ve crossed that line? Here are some warning signs to watch out for:
- Loss of Detail: If you find that you’ve lost important details, like the delicate features of a newborn’s face, you’ve likely gone too far.
- Unrealistic Textures: Sometimes, too much contrast or clarity can make textures look artificial. You want that inviting “feel” in your images, not a jarring visual.
- Inconsistent Appearance: If your edits make the photograph look like it belongs in a different context than initially intended, it’s time to reconsider your approach.
As an example, let’s compare two images—one over-processed and one carefully enhanced. A simple table can show the differences in measurements for clarity, contrast, and saturation between the two.
| Aspect | Over-Processed Image | Carefully Enhanced Image |
|---|---|---|
| Clarity | 75% | 40% |
| Contrast | 65% | 30% |
| Saturation | 55% | 15% |
As you can see, the over-processed image has much higher percentages, leading to a harsh and unnatural look, while the carefully enhanced image maintains its warmth and softness.
Embracing post-processing with a careful approach can lead to stunning results. Keep in mind the significance of natural textures, and strive to strike a balance that enhances your photographs without overpowering them. Good editing can *truly* elevate your work, turning everyday images into emotional, memorable keepsakes!
Conclusion: The Journey of Experimentation with Textures
As we reach the end of this exploration into textures, I want to emphasize a vital truth: embracing experimentation is key. Texture doesn’t just enhance a photograph; it transforms it. It colors our work with emotion and depth. So, why not take a leap? Let’s dive deeper.
Encouraging Creative Exploration of Textures
Textures are all around us. They invite us to look closer and interact more deeply with our environment. As photographers, we can use textures to tell stories. Each texture can evoke different feelings. Think of a soft, knitted blanket versus a rough piece of wood. One says, “cozy,” while the other shouts, “rustically beautiful!”
So how can we encourage this exploration? Here are a few approaches:
- Try New Materials: Look beyond what you already use. Textures can come from unusual places. Think about combining natural elements like twigs with soft fabrics.
- Mix Textures: Create layers. Use a rough backdrop with a soft focal point. This contrast can add depth and intrigue.
- Document Your Process: Keep track of what works and what doesn’t. This will not only help you but also inspire others.
In photography, especially in newborn settings, safety and comfort come first. Just imagine how a baby feels against a plush knit blanket. It’s inviting and warm. Yet, we shouldn’t shy away from experimenting with other textures too—just ensure they are safe and soft!
Insights Gained from Trial and Error
Every click of the shutter brings with it an opportunity to learn. Often, my best shots didn’t come from a meticulous plan. Instead, they emerged through trial and error. It’s about discovering what works in the moment.
Here are some lessons I’ve learned:
- Not every texture suits every subject: Some textures can overpower the main focus. Always remember to evaluate how a texture interacts with your subject.
- Lighting plays a pivotal role: Different textures react uniquely under various lighting conditions. Play with shadows and highlights to see what you discover.
- Sometimes ‘less is more’: Too many textures can create chaos instead of harmony. Aim for balance.
“Success is often achieved by those who don’t know that failure is inevitable.” – Coco Chanel
This quote resonates strongly in photography. Remember that every failed attempt brings you one step closer to success. Embrace those missteps; they’re part of your journey.
The Community of Photographers and Sharing Experiences
Photography, especially the exploration of textures, is not a solitary journey. A rich community exists, ready to share insights, tips, and inspiration. Through forums, social media, workshops, and meetups, we can connect with fellow photographers who are just as passionate about textures.
Consider this:
- Join Online Groups: Platforms like Instagram and Facebook have amazing communities that focus on texture photography. Share your work and get feedback.
- Attend Workshops: There’s nothing like gaining hands-on experience. Workshops are a great way to learn from others and experiment with new techniques.
- Collaborate: Reach out to local photographers. Collaborating can lead to unexpected discoveries.
When we share our experiences, we contribute to a vibrant tapestry of knowledge. Each story, each texture, adds layers to our artistic expression.
TL;DR
In conclusion, the journey of experimenting with textures in photography challenges us to be creative. By exploring, learning from our missteps, and sharing with the community, we can all enhance our work and create powerful visuals. So, let’s celebrate our creative processes and continue to inspire each other!
Textures invite us to play. They are our canvas, waiting for us to craft our art. So grab your camera, step out, and start exploring. The world of textures awaits!
